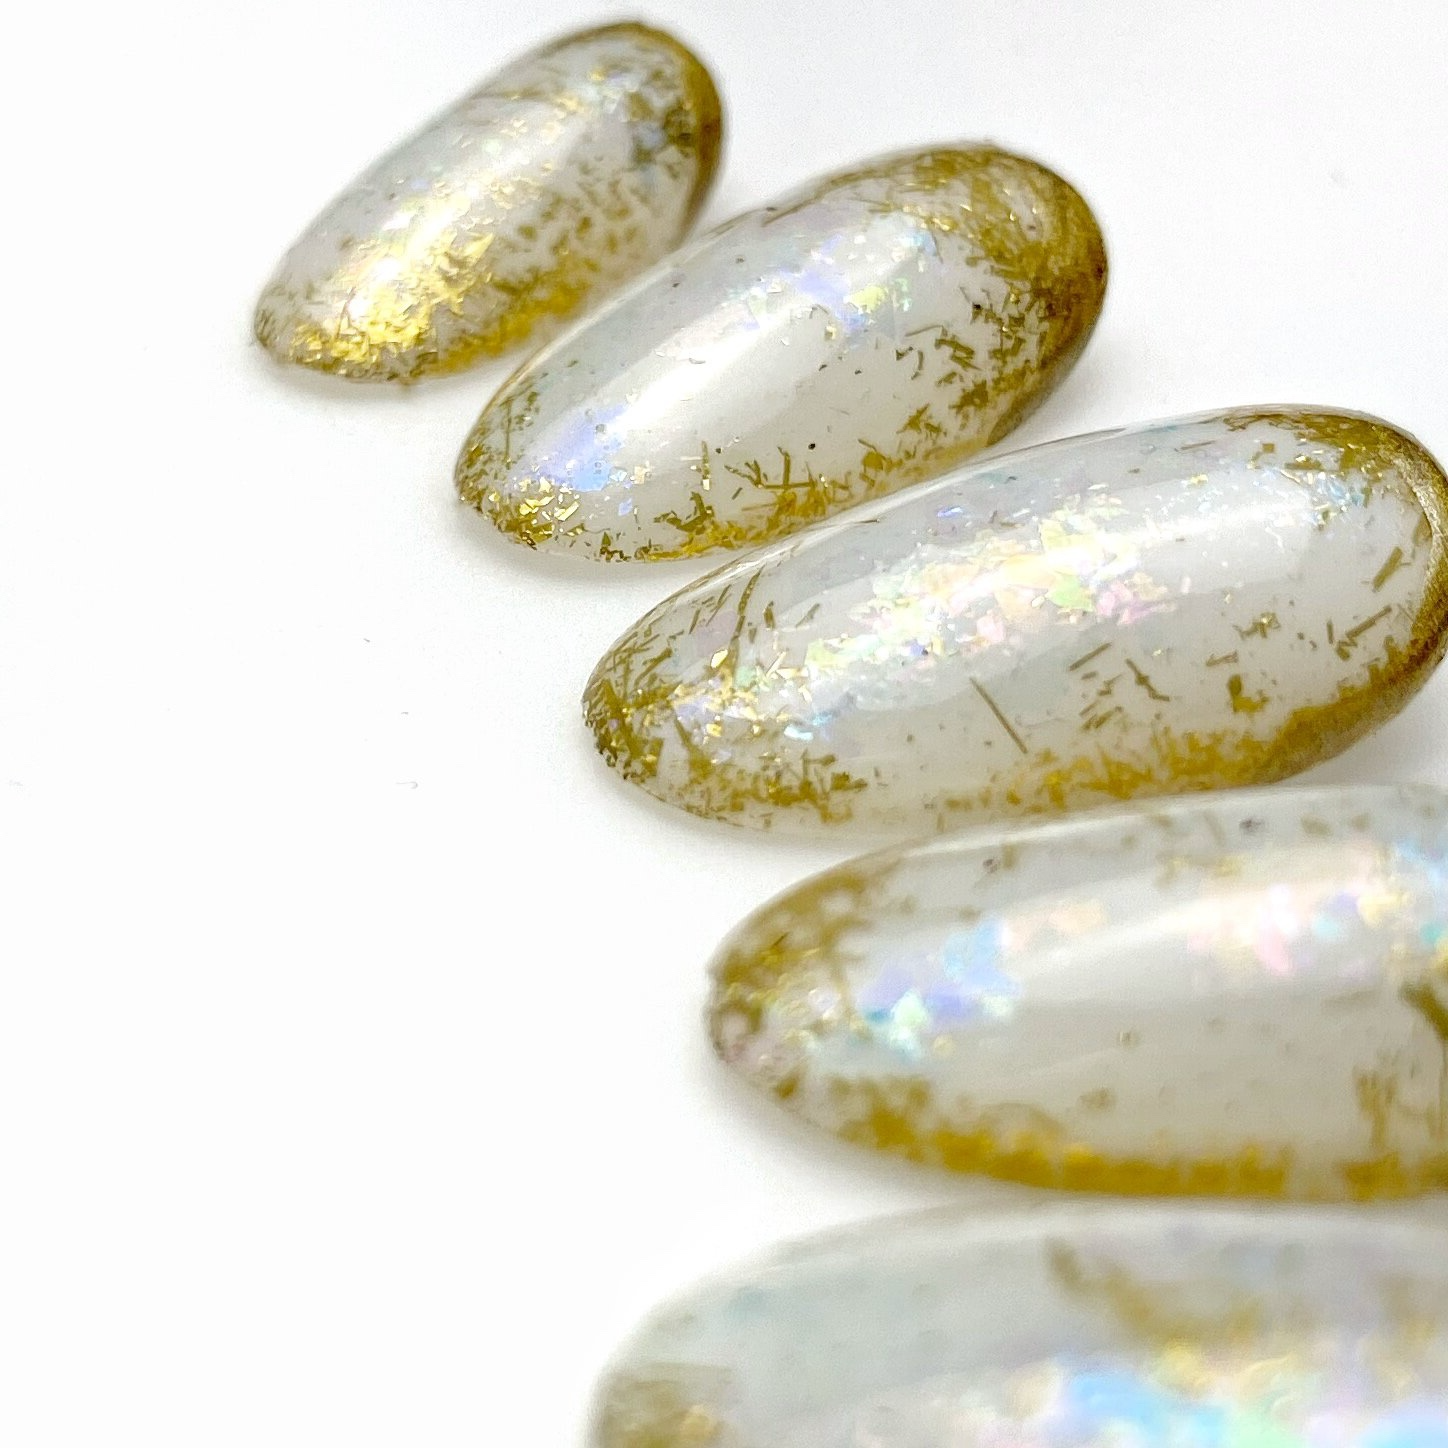
• PORTFOLIO
  • ABOUT
  • PRESS
  • SALON APPOINTMENTS

Rachel Messick

manicurist

  • PORTFOLIO
  • ABOUT
  • PRESS
  • SALON APPOINTMENTS

Celestial Opal Nail Tutorial


It’s no secret I like my nail art simple, unique with some serious depth. Enter stage right, Celestial Opal, checking allllll the boxes. This look is beautiful as a full set on all ten nails or as an accent on a few. She’s versatile and universally flattering on EVERYBODY.

IMG_8355.jpg

This is another look that builds it’s depth with layers, starting with a milky base and layering in duo chrome flakes and gold filter foil like a sassy Opal inspired seven-layer dip of awesome.

I originally create this look for my client Missy, late last year and was super excited to add it to my press-on shop and now a step-by-step for you to recreate.

IMG_3174.jpg

Step 1: Prep and Base Coat, cure.

Step 2: Apply single layer of Presto Color Gel #3 and cure

Step 3: Leaving sticky layer in tact, add Kokoist Rainbow Mica and Nail Labo Foil Flakes, then tap and burnish Clou Good Fiber along the perimeter of the nail.

Step 4: Apply a coat of Kokoist Art Clear, give it a moment to self level and then cure.

Step 5: Add single coat of Presto Color Gel #180 and cure

Step 6: Leaving sticky layer in tact, burnish additional gold fiber to create depth

Step 7: Apply a thin coat of Kokoist Art Clear, give it a moment to self-level and then cure.

Step 8: Add a cuff around the top of the nail using Kimagure Cat Liquid Metal Gold gel and then cure for full 60 seconds.

Step 9: Apply Kokoist Ultra Glossy Non Wipe Top Gel and cure

IMG_1240.jpg


Products Used

Kokoist Bonding DUO in Bottle

Kokoist Ultra Glossy Non Wipe Top Gel

Kokoist Art Clear

Presto Color Gel #3 & #180

Kimagure Cat Liquid Metal Gold Gel

Kokoist Rainbow Mica R-2 Golden Purple

Nail Labo Foil Flakes Pink Aurora

Clou Gold Fiber


tags: Tutorial, stone nail art, gel
categories: Pro Tutorial
Monday 07.20.20
Posted by Rachel Messick
 

Always Amethyst Nail Art Tutorial

Stone and gem inspired nail art are MAJOR. It’s a trend that seems to continuously reinvent itself month after month. During the Spring and summer, clients want Rose Quartz and Amethyst, Tigers Eye and Black Opals for Halloween and the winter holidays mean opals, jade and marble. The good news is, once you figure out a few different variations in this technique, you can pretty much do anything.

Stone inspired nails are a great entry point into the world of nail art for clients and manicurists alike. Creating stone art (like most of the art I do) is an exercise in thinking through your layers before you start. For this look we’re using a milky semi-sheer lavender base with a shock of a custom purple jelly blend throughout. We add dimension with mica flakes and create stylized veins with a super pigmented white art gel and bring it all together with top layer of sheered out white lavender.

Some notes on the white veins, wipe your brush frequently on your palettes that it doesn’t drag too heavily throughout. Be sure to flash cure or fully cure between completed veins, especially if they are touching or overlapping.

Here are some links to the products I used to create this look:

Presto Color Gel #178

Presto Color Gel #180

Ageha Sharp Liner White

Kokoist E-204S Violet Fizz

Kokoist E-227S Licorice Jelly Beans

Kokoist Rainbow Mica Flakes R-2 Golden Purple

Kokoist Art Clear

Presto #6 Square Brush

Presto #11 Fine Point Brush

Kokoist Ultra Glossy Non Wipe Top Coat Gel

tags: pro tutorial, stone nail art
categories: Pro Tutorial
Monday 06.22.20
Posted by Rachel Messick
 

Powered by Squarespace.