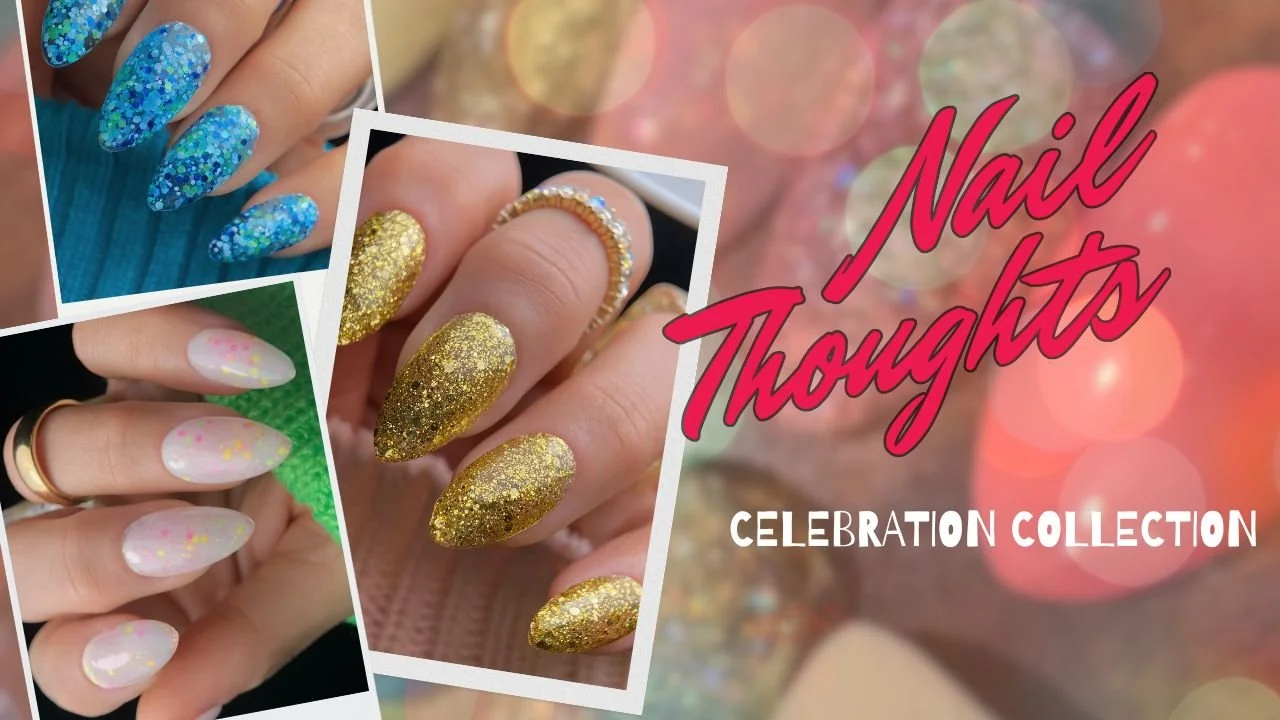
Interview with Nail Thoughts founder Katie Masters on the Celebration Collection, surpassing 100 shades, packaging updates, and full swatches.
Nail Art Tutorial: Abstract Lava Lamp
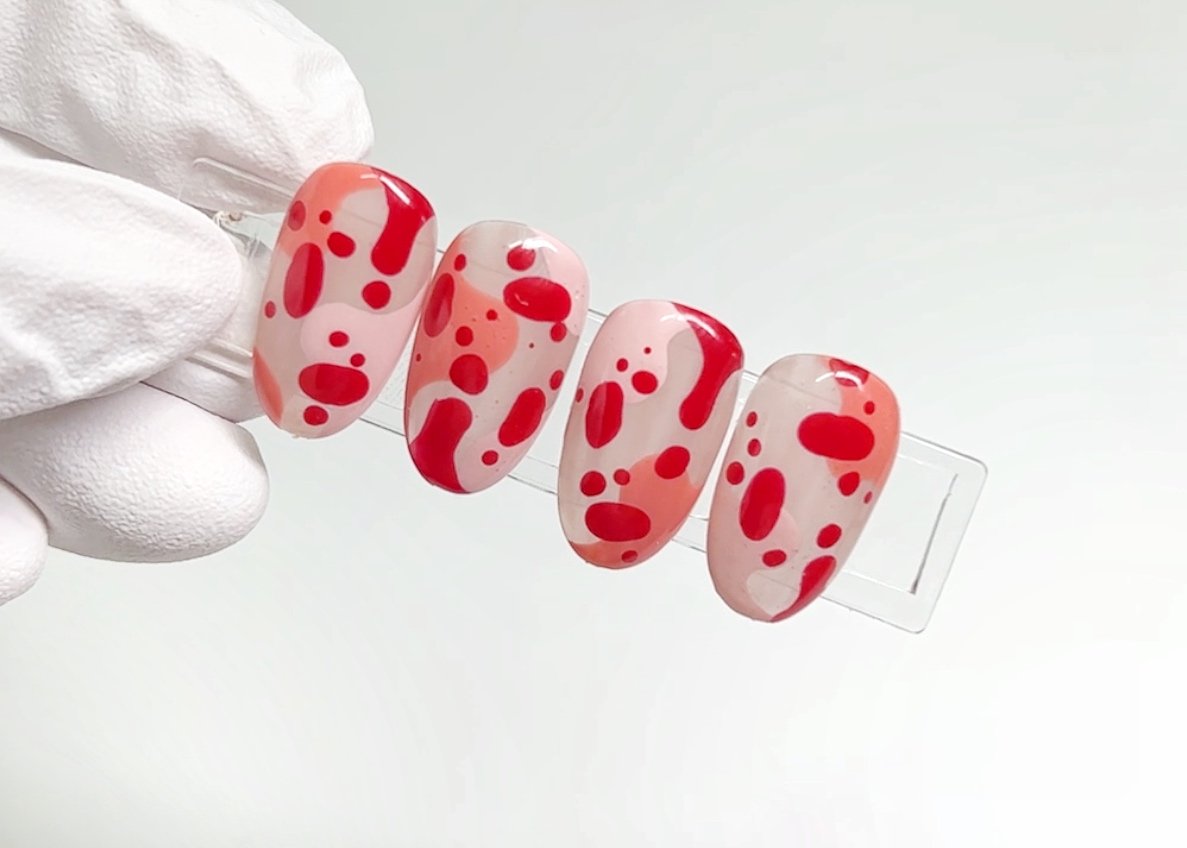
Ah yes, the delcious nebulous amorphic nature of the lava lamp. When I was a youth in the 90’s, 70’s nostalgia was in full swing. Claire’s accessories was selling beaded curtains and magic mushroom inspired tie dye candles (that I was NOT allowed to light) and you couldn’t pry daisy motifs and happy face t-shirts out of my ravenous teen hands. Suffice it to say, having a lava lamp was a major indicator of coolness.
While there are definitely more on-the-nose lava lamp manicures out there, I’m more of a fan of a nod-and-wink approach to inspiration. What better way to modernize the lava lamp vibe than to throw in some #aestheticgirl details and a valentine’s adjacent color palette.
Step-by-Step:
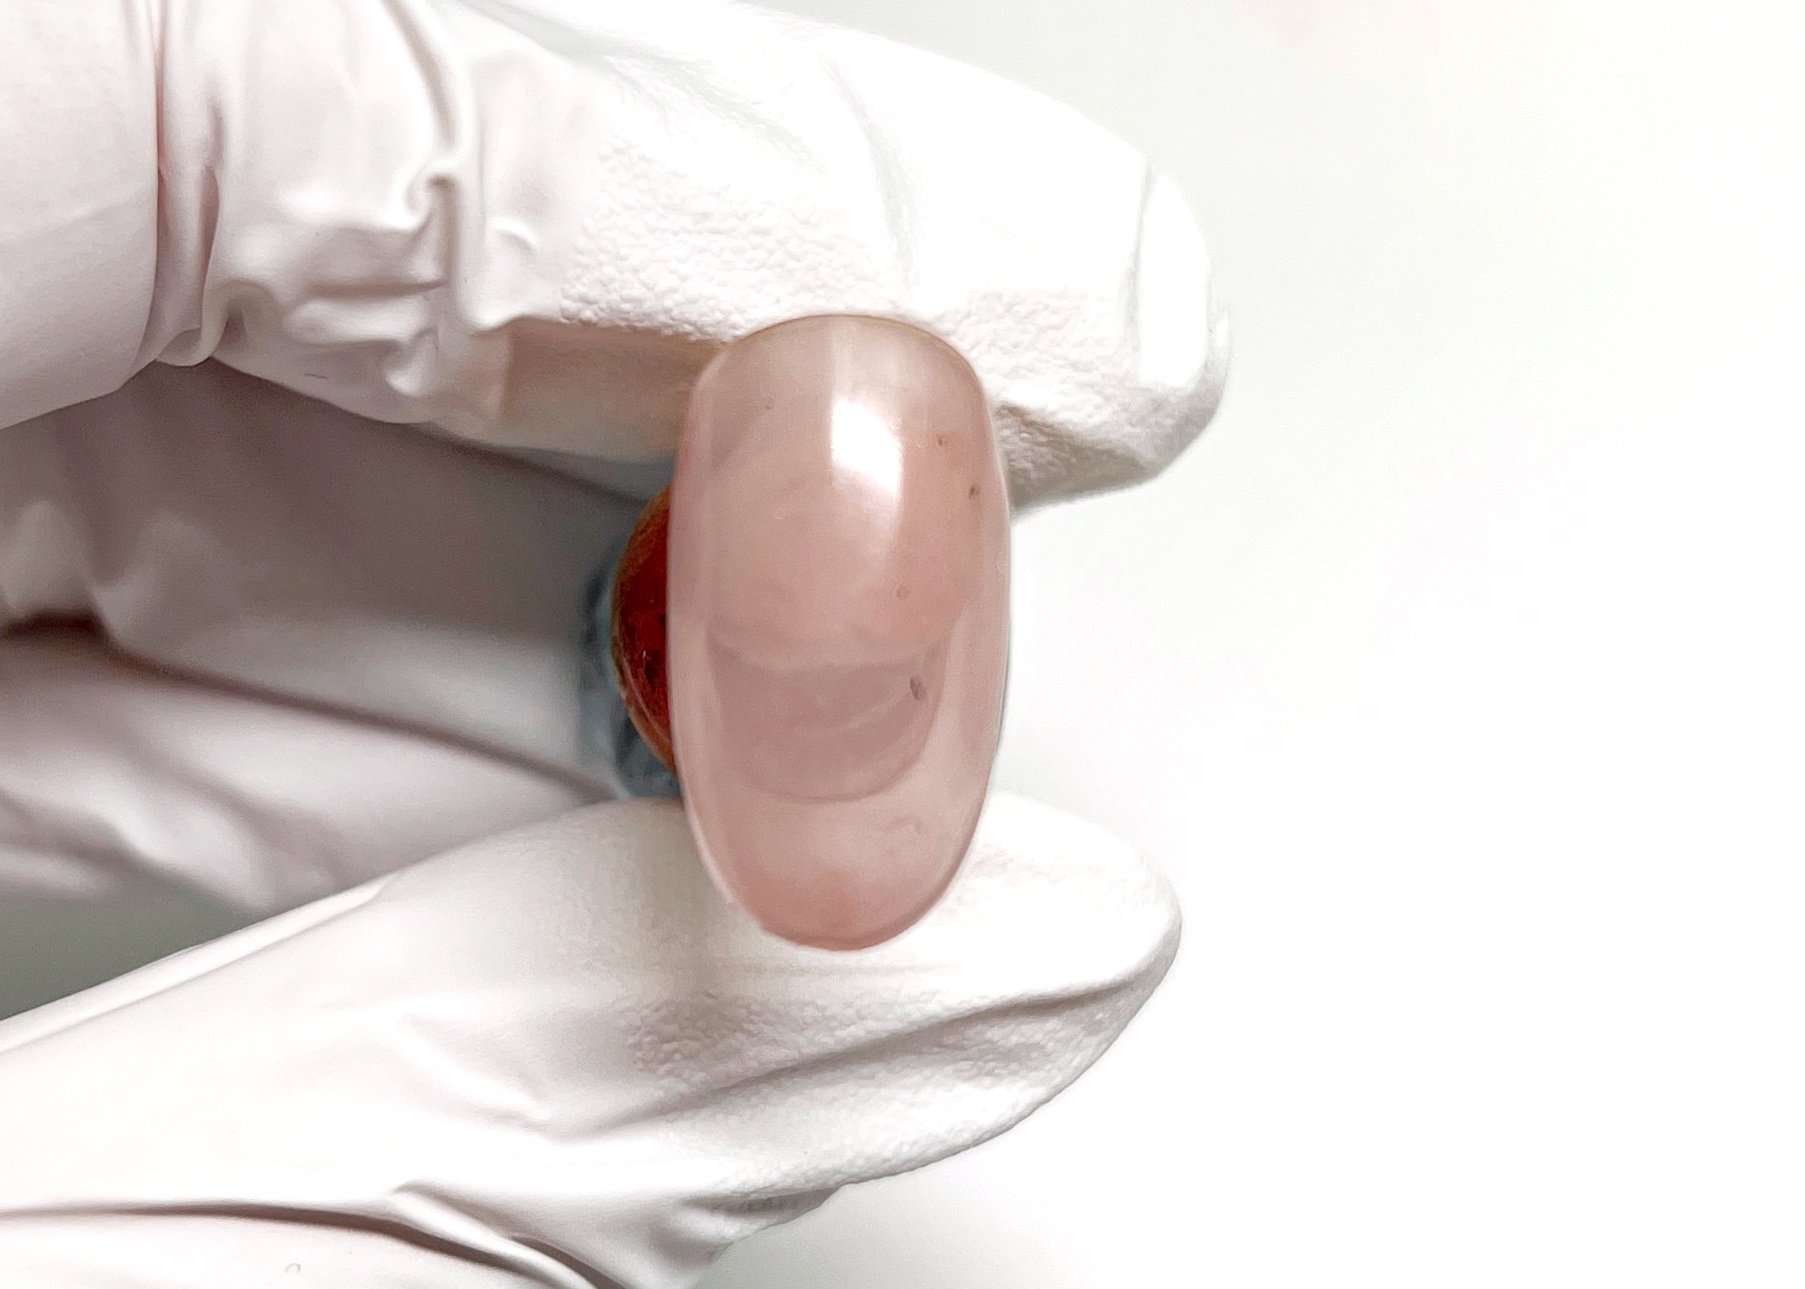
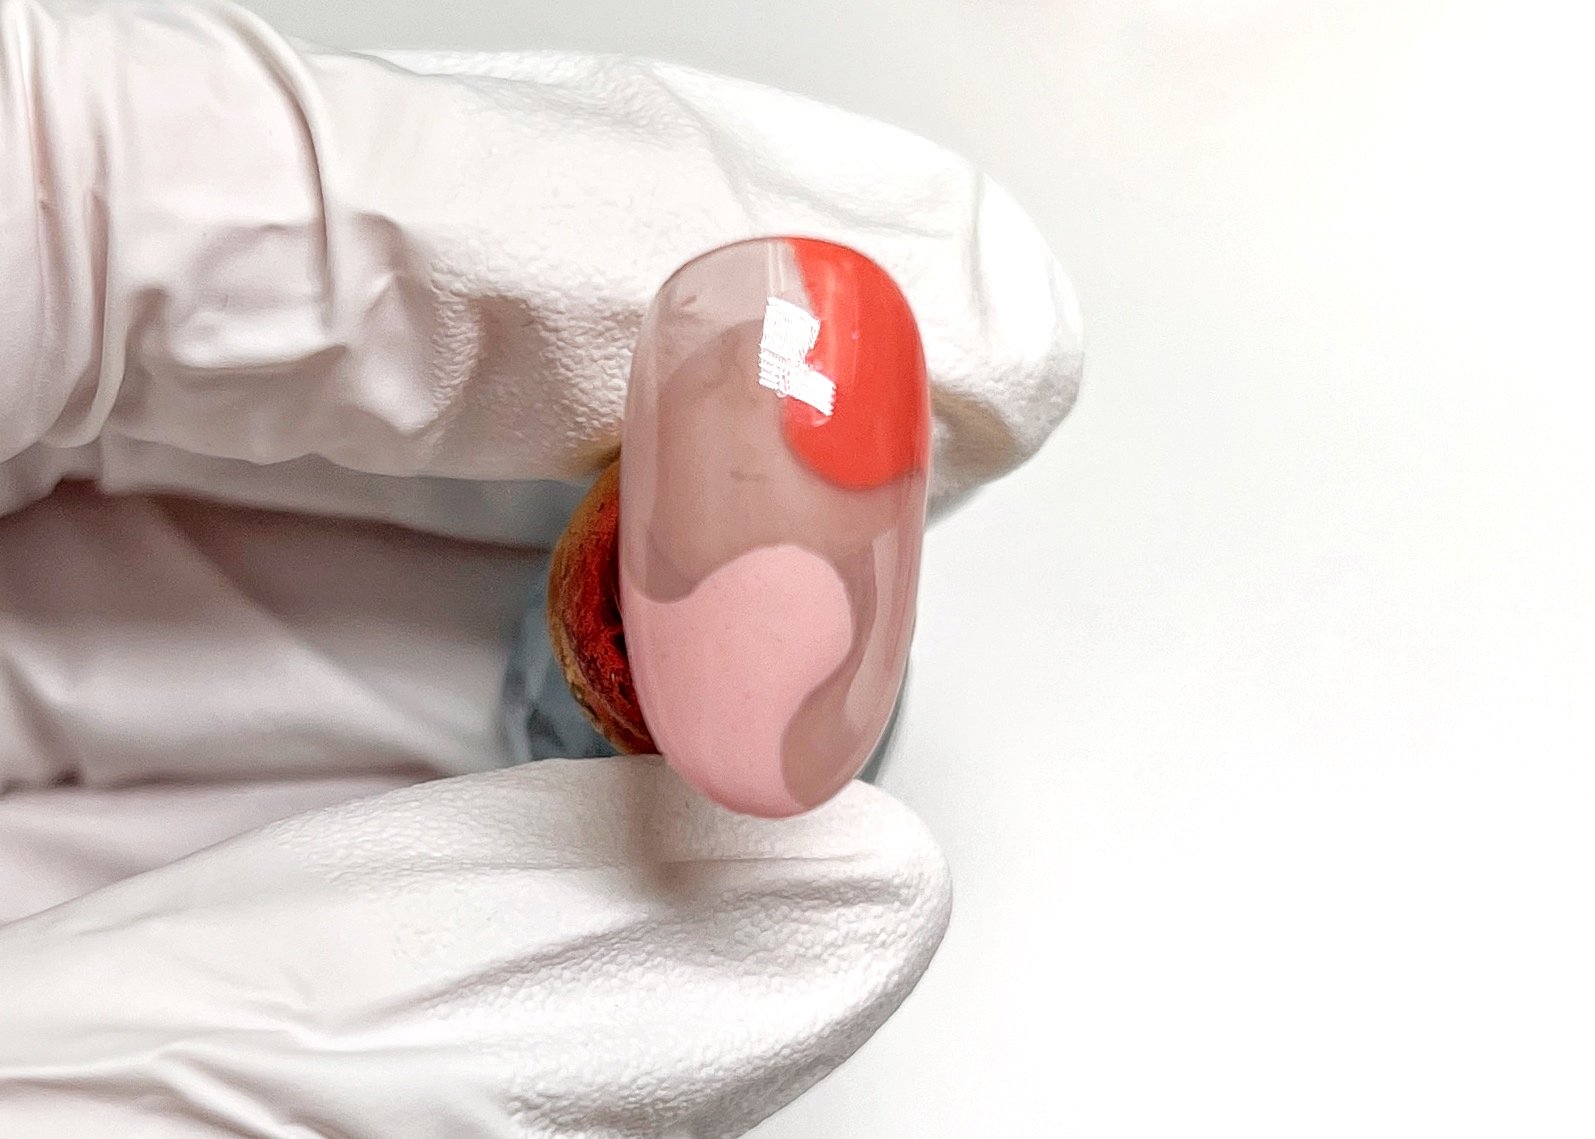
First things first, you’ll want to lay down two coats of E-175S Boysenberry Candy using you rapplication brush of choice (I’m using a Thin Round brush) curing between coats.
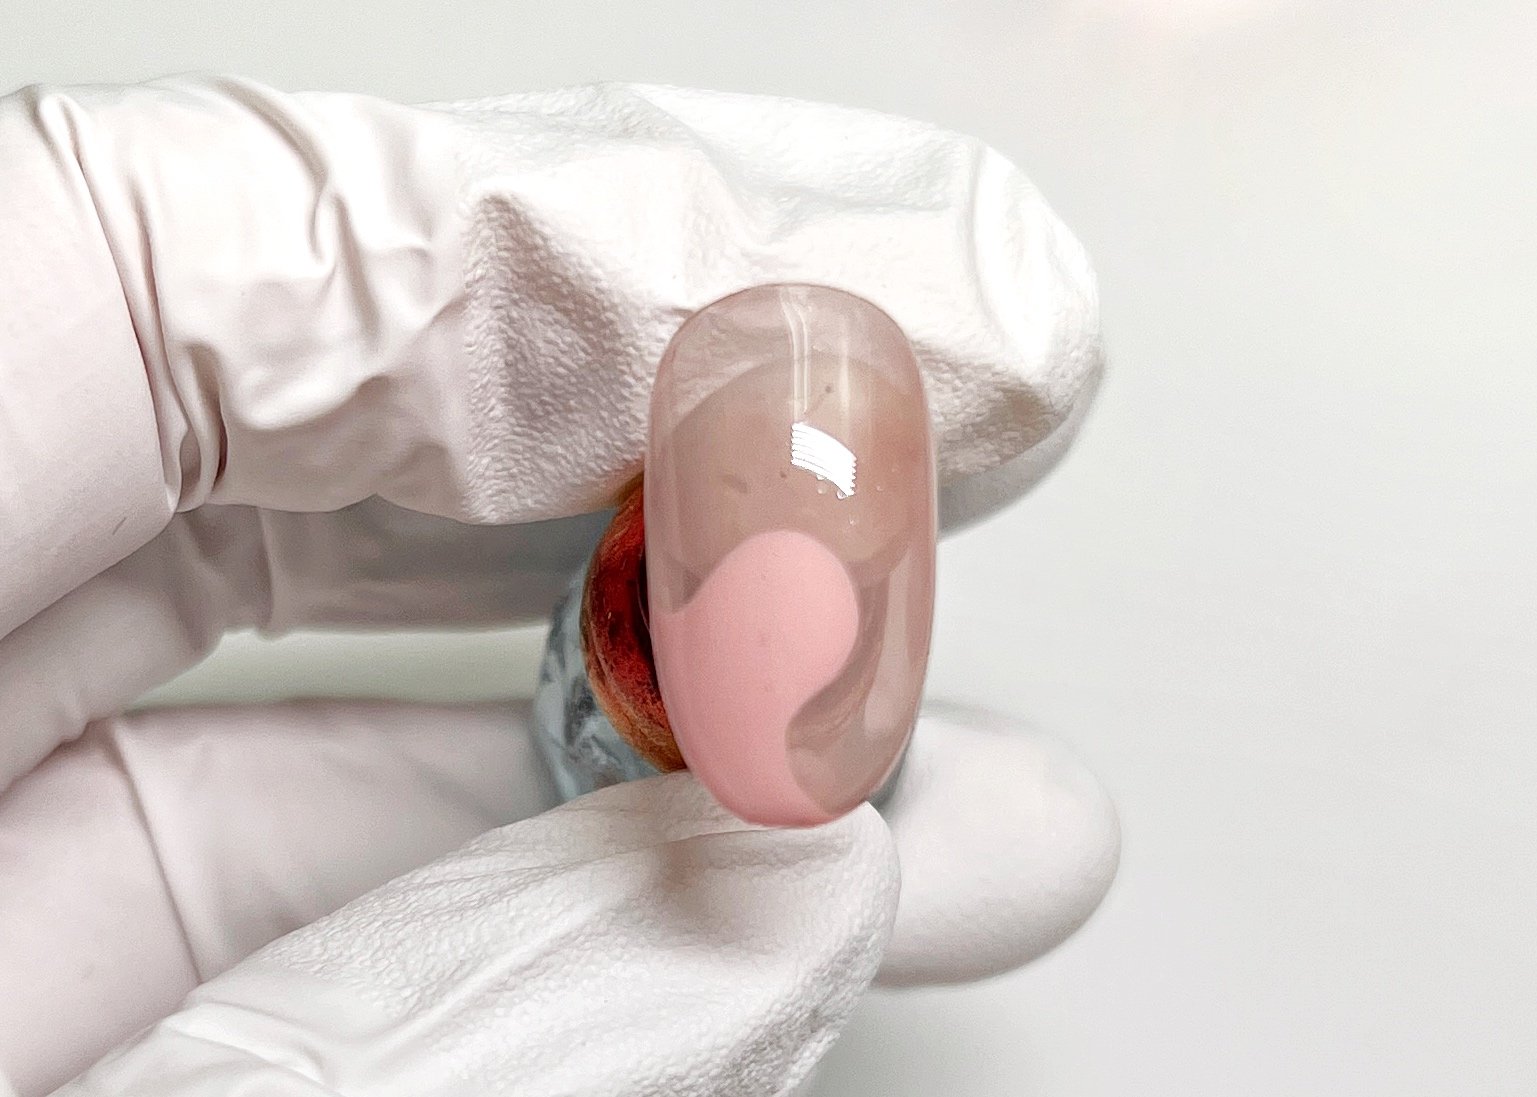
Using a detail brush create a larger abstract blob-shape with E-127 Strawberry Latte, cure.
Using the same techniue add another abstract blob of F Gel Color Gel #2 (a dusty coral), cure. Be careful going too thick with super pigmented bottled gels, they self-level really beautifully but it’s also easy to create a layer so thick it can’t properly cure.
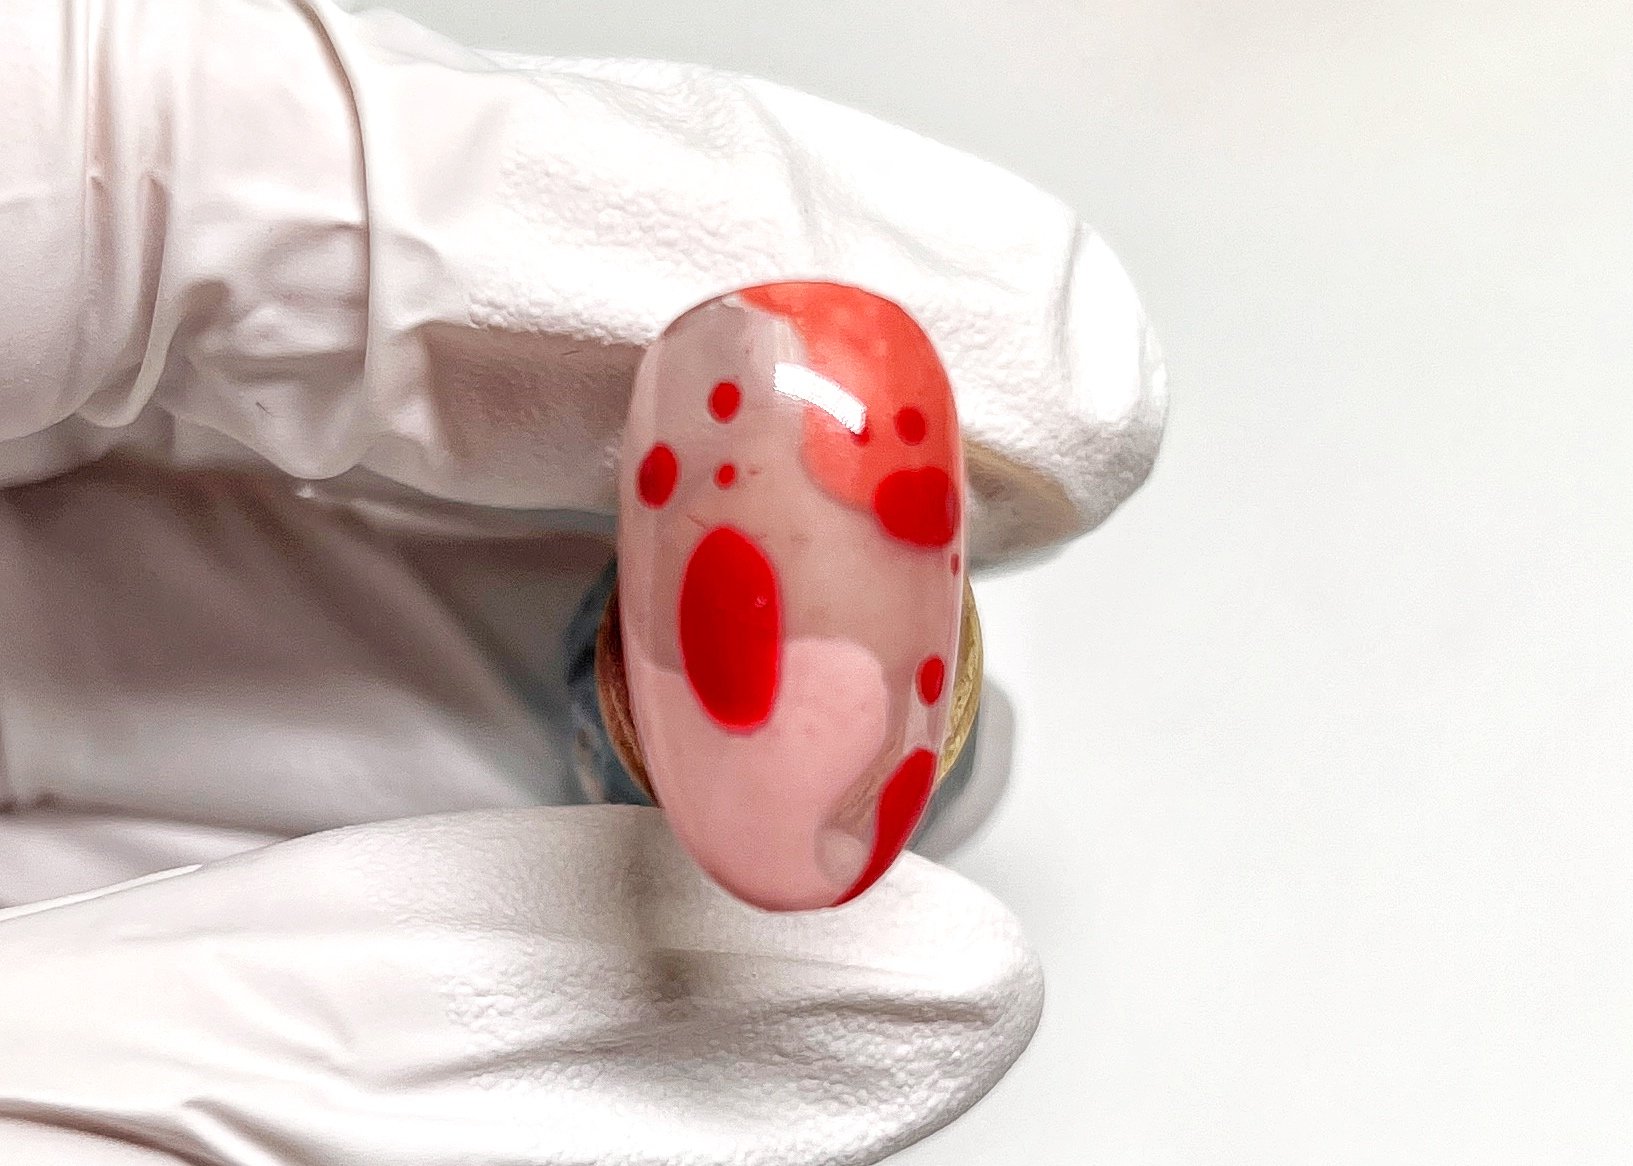
It’s ok to cure as you go with this next part, or if you like to live on-the edge and do it all at once- lmay the odds be ever in your favor. Using a dotting tool, start placing your larger oval-ish blobs first using F Gel Color Gel #53. This will help you ensure that you don’t overcrowd the nail and loose the floating lava lamp effect. Cure.
Now that you’ve placed the larger dots, go in and add additional dot detail. Cure.
Whenever I’m working with a raised design, I’ll always apply my top coat a bit more strategically. I always top coat on nail at a time. Using the Ultra Glossy Non-Wipe Top Coat Gel (say that 5 times fast, geez) I’ll scrub in a thin slip layer, ensuring that all the nooks and crannies are acocunted for. While that layer is wet, add a thicker layer of top gel and float it down the nail. Keep an eye on the line-of-light (the reflection of your table light) and watch it start to self level, be patient. Once the self leveling as starting you can start to attack problem areas- usually it’s going to be a little speed bump near the free-edge. Usually flipping the nail updise down for a few seconds and then dragging the product from the free edge to the apex does the trick (you can see me do it in the video).
Let your no-wipe top coat cool down for about 10 seconds, wipe it with a little alcohol (I use 70% or 99%) and then shine it up with some acetone. Turns out we should have been wiping these no-wipe top coats the whole time.
Use code RACHEL10 to save at Kokoist, Zillabeau (F Gel), My Nail Stuff, Hae Nails and Gellyfit.
These are affiliate links, meaning, at no additional cost to you I may recieve a commission if you choose to purchase using my links and/or discount code. Click for disclosure statement.
Dapper French

As much as I wish I had a super quick french manicure hack, the truth is, it’s a little different for every nail shape and length. I find, for me, the best way is to sketch out the smile line, fill in and then perfect with a tapered clean up brush.
The real show stopper here is the Ultra Diamond No-Wipe Top Coat, it’s such an easy way tp add a nice even layer of glitz for the holidays.
You can save 10% off your Kokoist USA goodies when you shop using code RACHEL10. This is an affiliate link, disclosure statement here.
Neon Matisse Nail Art Tutorial

Modern art has always had a place in my heart and, as I was growing up, the walls of my family home. While I’m not necessarily taken by everything Gen-Z is reviving (sweater vests and low rise jeans are a hard pass for me) the renaissance of respect for Henri Matisse’s cut outs is right up my artistic alley.

Image Courtesy of MoMA.org
The key to the bulbous ends on the leaves is to put just a little too much gel on the edge of your brush and place the edge first and drag towards the steam. I’m using my favorite detail brush by Narina Chan. You can definitely use any color palette you like, I just love the juxtaposition of the muted rust orange and the pop of neon pink.
Products used:
Kokoist Color Gel E-218 Smoky Persimmon & E-23 Neon Toy Pink
Nail Thoughts x Kokoist Application Brush
Kokoist Velvet Matte No-Wipe Top Coat
You can save 10% on your Kokoist purchase when you use code RACHEL10. This is an affiliate link, you can read my disclosure statement here.
Dark Marble

We’re on cruise control straight into Spooky Season. If you’re looking for something Halloween-y that’s not like skulls and blood, this look is for YOU. I love the way the mica flakes pop through the jelly black, creating an oil-slick rainbow when the light hit’s it just right.
Step 1: After you cure your base gel, gently press Green Rainbow Mica Flakes and Blue Rainbow Mica Flakes into the sticky inhibition layer, encapsulate with a thin layer of art gel, cure.
Step 2: Apply two coats of E-206S Black Martini, curing between coats.
Step 3: Apply a thin player of Pre-Art gel, cure.
Step 4: Apply diagonal dots of Black Bleeding Ink, give it about 10-20 seconds to dry out a little and then using the Pointed brush with alcohol (be sure it’s not too saturated) gently pat the ink so that it dissipates in to a marble-ish pattern. Let dry completely and add a thin layer of Pre-Art Gel, cure.
Step 5: Repeat step 4, but place it on the other side of the nail.
Step 6: Apply No-Wipe Top Gel and cure.
You can save 10% on your Kokoist USA purchase when you use code RACHEL10. This is an affiliate link, disclosure statement available here.
Natural Accent Gel Nail Tutorial

Do you ever have a nail art concept that you just can’t wrap your head around? Welp, that was me with chrome accents. Thankfully, when chatting with Marissa (one of the artists at Vacation Nail Collective) and she gave me the tip of a lifetime (I’ll share below). Instead of a matte top coat, you need to buff the surface of the nail. MIND BLOWN. All these months I was trying to use matte top coat to try to sequester the chrome zone and it was driving me full bonkers.
Here are the essentials for creating this look:
Thin No-Wipe Art Gel: Earlier this year Nail Labo repackaged and launched a TON of clear gels and while I was shopping a particular one caught my eye: Pre Art Gel. It’s a no-wipe gel with just a hint of an inhibition layer, so it’s stellar for chromes, but I’ve also been loving it to create a nice smooth surface when I really need to precision paint. Since it’s not a top coat, it’s easy to layer between other products.
Thick No-Wipe Art Gel: I snagged the TOY’S x INITY No Wipe Art Clear High gel from Nail Formula (a Canadian based Japanese nail product import shop). It’s thick and get for creating really raised looks like this one. They also make No Wipe Art Clear Low that I really really love as well.
Sponge Buffer: This is the trickier one, but I really love the 180 grit side of the Kokoist Sponge Buffer Moon, it’s not excessively abrasive so it’s easy to gently buff away the shine without removing color.
Step 1: Two coats of a soft milky pink- cure between coats. I’m using Haven by Luxio.
Step 2: Apply a coat of clear gel- cure.
Step 3: Gently buff the surface of the cured clear gel using a 180-grit or finer sponge buffer.
Step 4: Add an elevated swoop of thick clear no-wipe gel where you’d like the chrome detail, cure.
Step 5: Add your chrome on top of the clear art gel. I’m using @kokoistusaChrome Pen in Silver.
Step 6: Add Charm gel and place your shell.
Step 7: Seal it all in with a thin No-Wipe Art Gel or Top Gel, cure.
Step 8: Complete the look by encapsulating everything with a glossy top gel.
Meet Me in Tulum: NailPro Magazine Feature

When NailPro Magazine reached out to me to create looks inspired by Tulum, Mexico- my mind immediately went two places: vibrance and earthiness. If you’ve ever had the privilege to spend time in Mexico, these are two common threads seen throughout- be it in folk art, buildings, artists and just the general beauty of the culture, people and land.
Let’s start with my first look: Abstract Tropical.

Here’s a video of me creating the Abstract Tropical look:

I love the contrast of earthy ceramics and rustic texture. There’s just a grounded beauty to ceramic inspired art, and some of my earliest exposure to ceramics was in Mexico. My parents loves to adorn their house and yard with pieces from local artisans whenever we visited.

Here’s a video of me creating the Gilded Ceramic look:
Nuance Tortoise Shell Tutorial
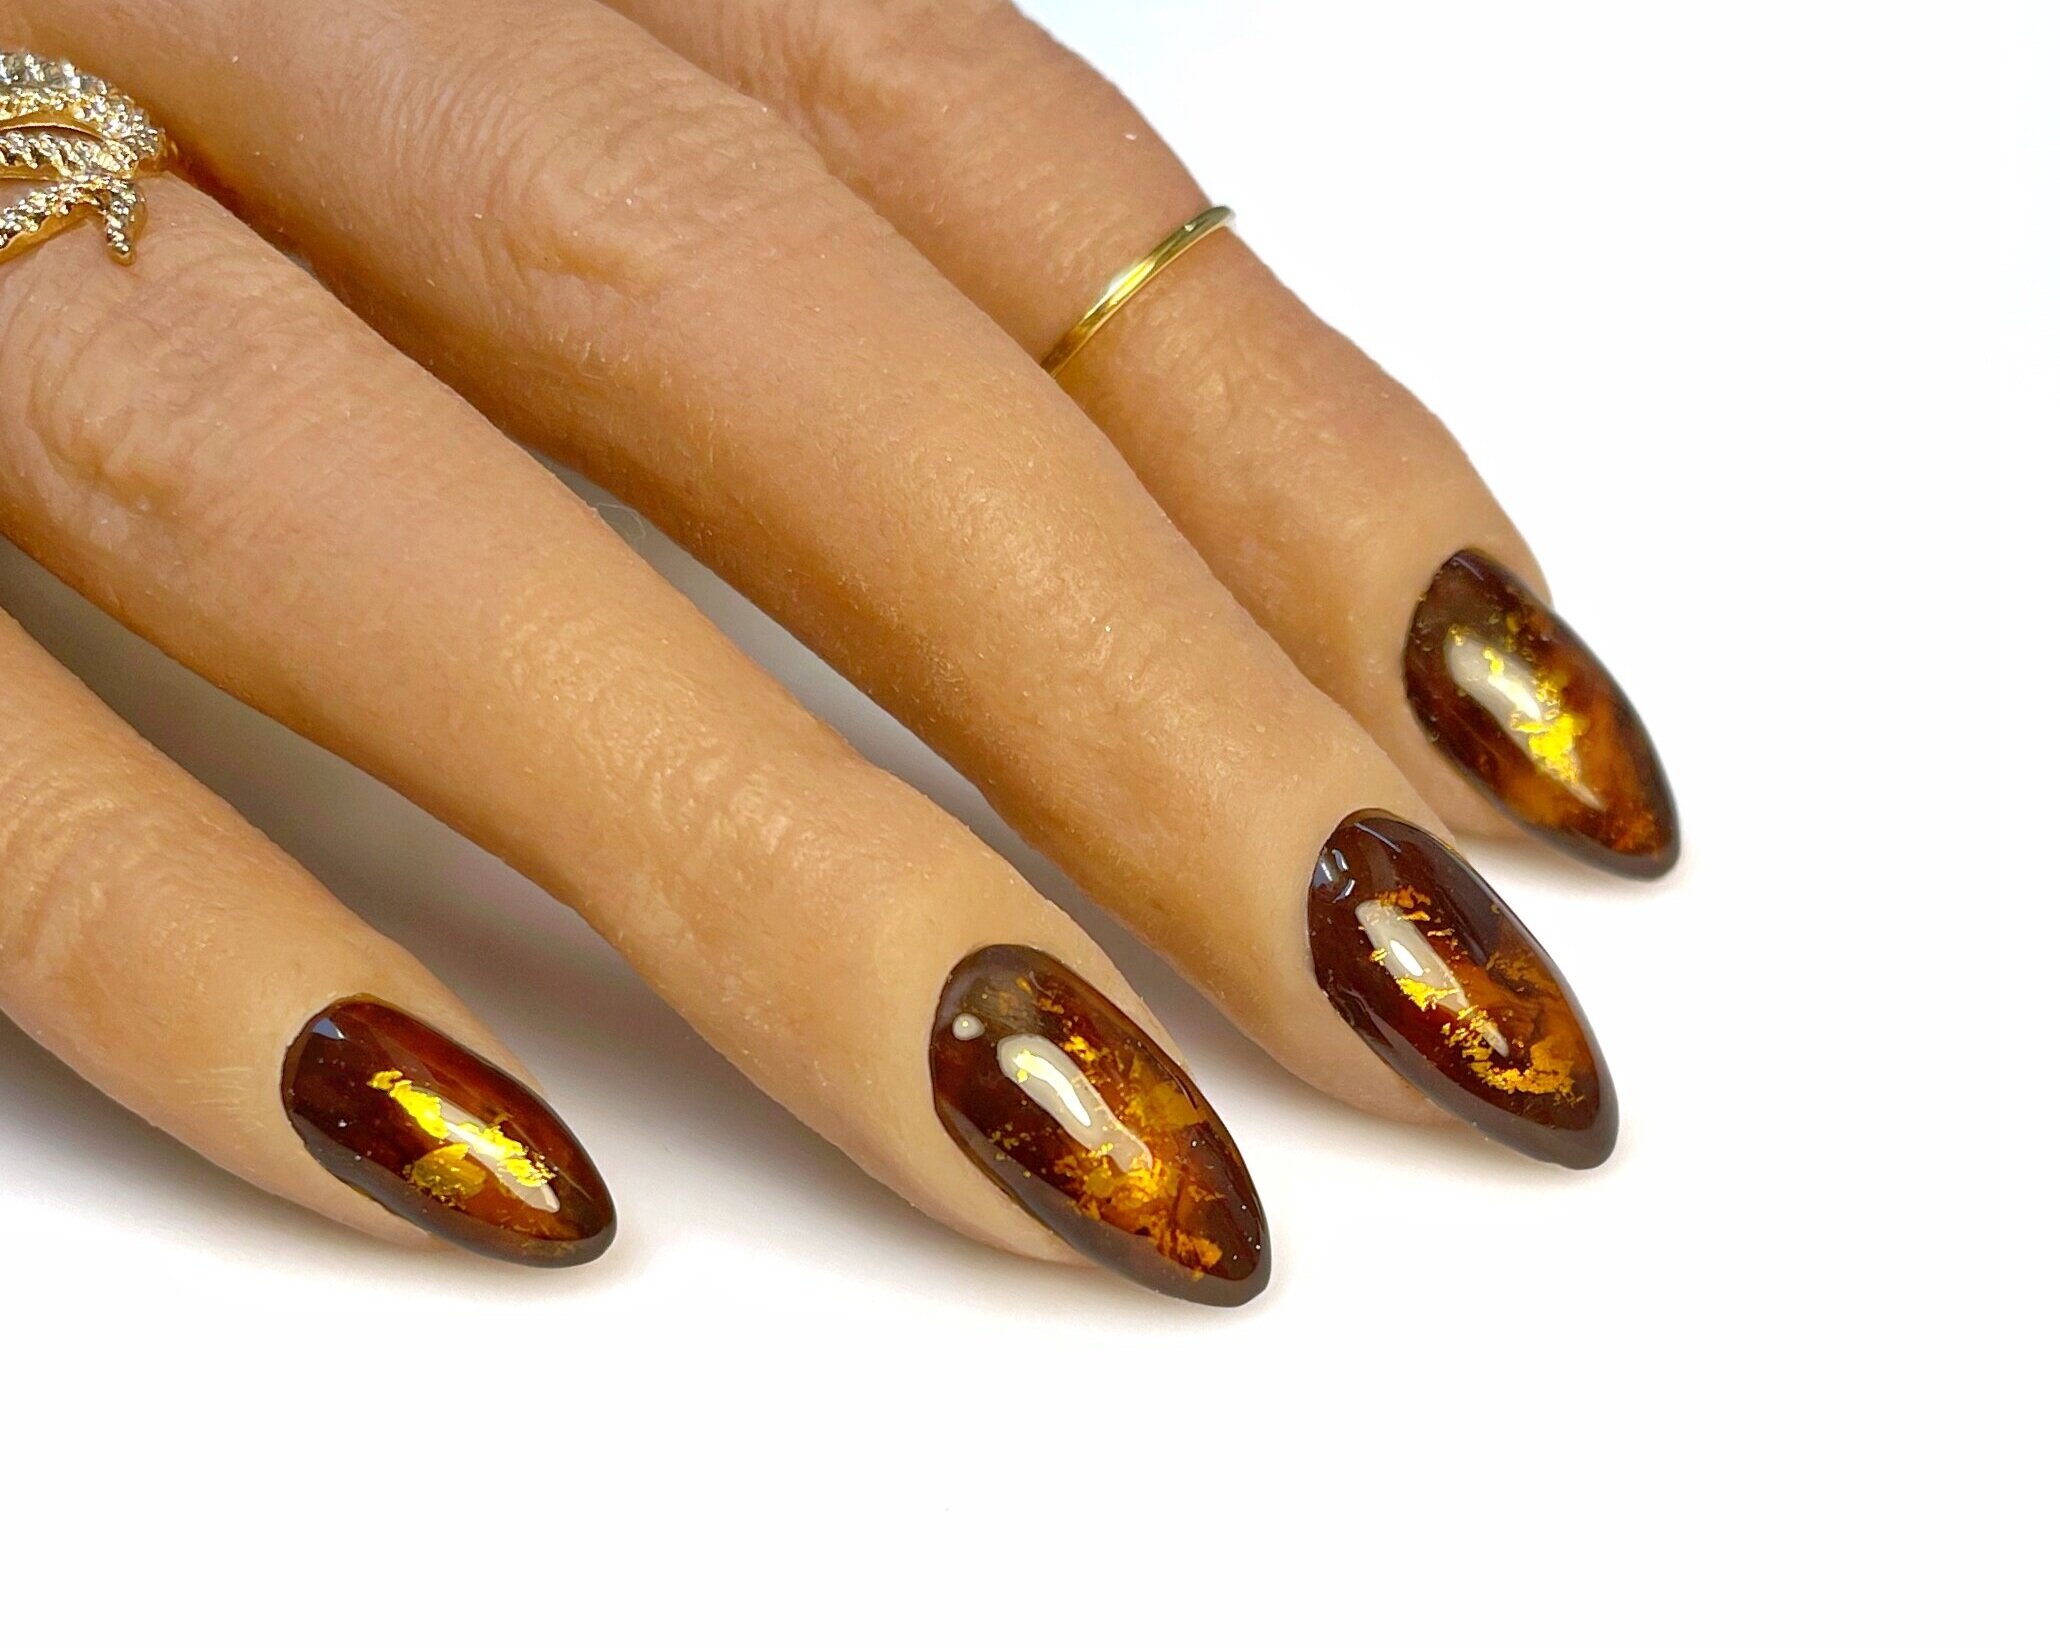
In my studio, we go gaga for tortoise shell designs of all kinds. You want a punchy traditional amber tortoise? say no more. You want a blonde tortoise? I got you. The one type of tortoise that was missing from my arsenal was a melty, caramel swishy tortoise. The kind of tortoise that would adorn a vintage compact or music box.

VIntage Tortoise Shell Box for Inspiration
This technique utilizes wet layers, meaning we’re going to me smushing and swirling a a bit before the hand ever goes in to the lamp for a cure. The trick with wet layers, is that you want to give them a moment to settle in and disperse before you cure.

Let those wet layers swirl and twirl, don’t overwork them.

Jelly Clouds Nail Art Tutorial
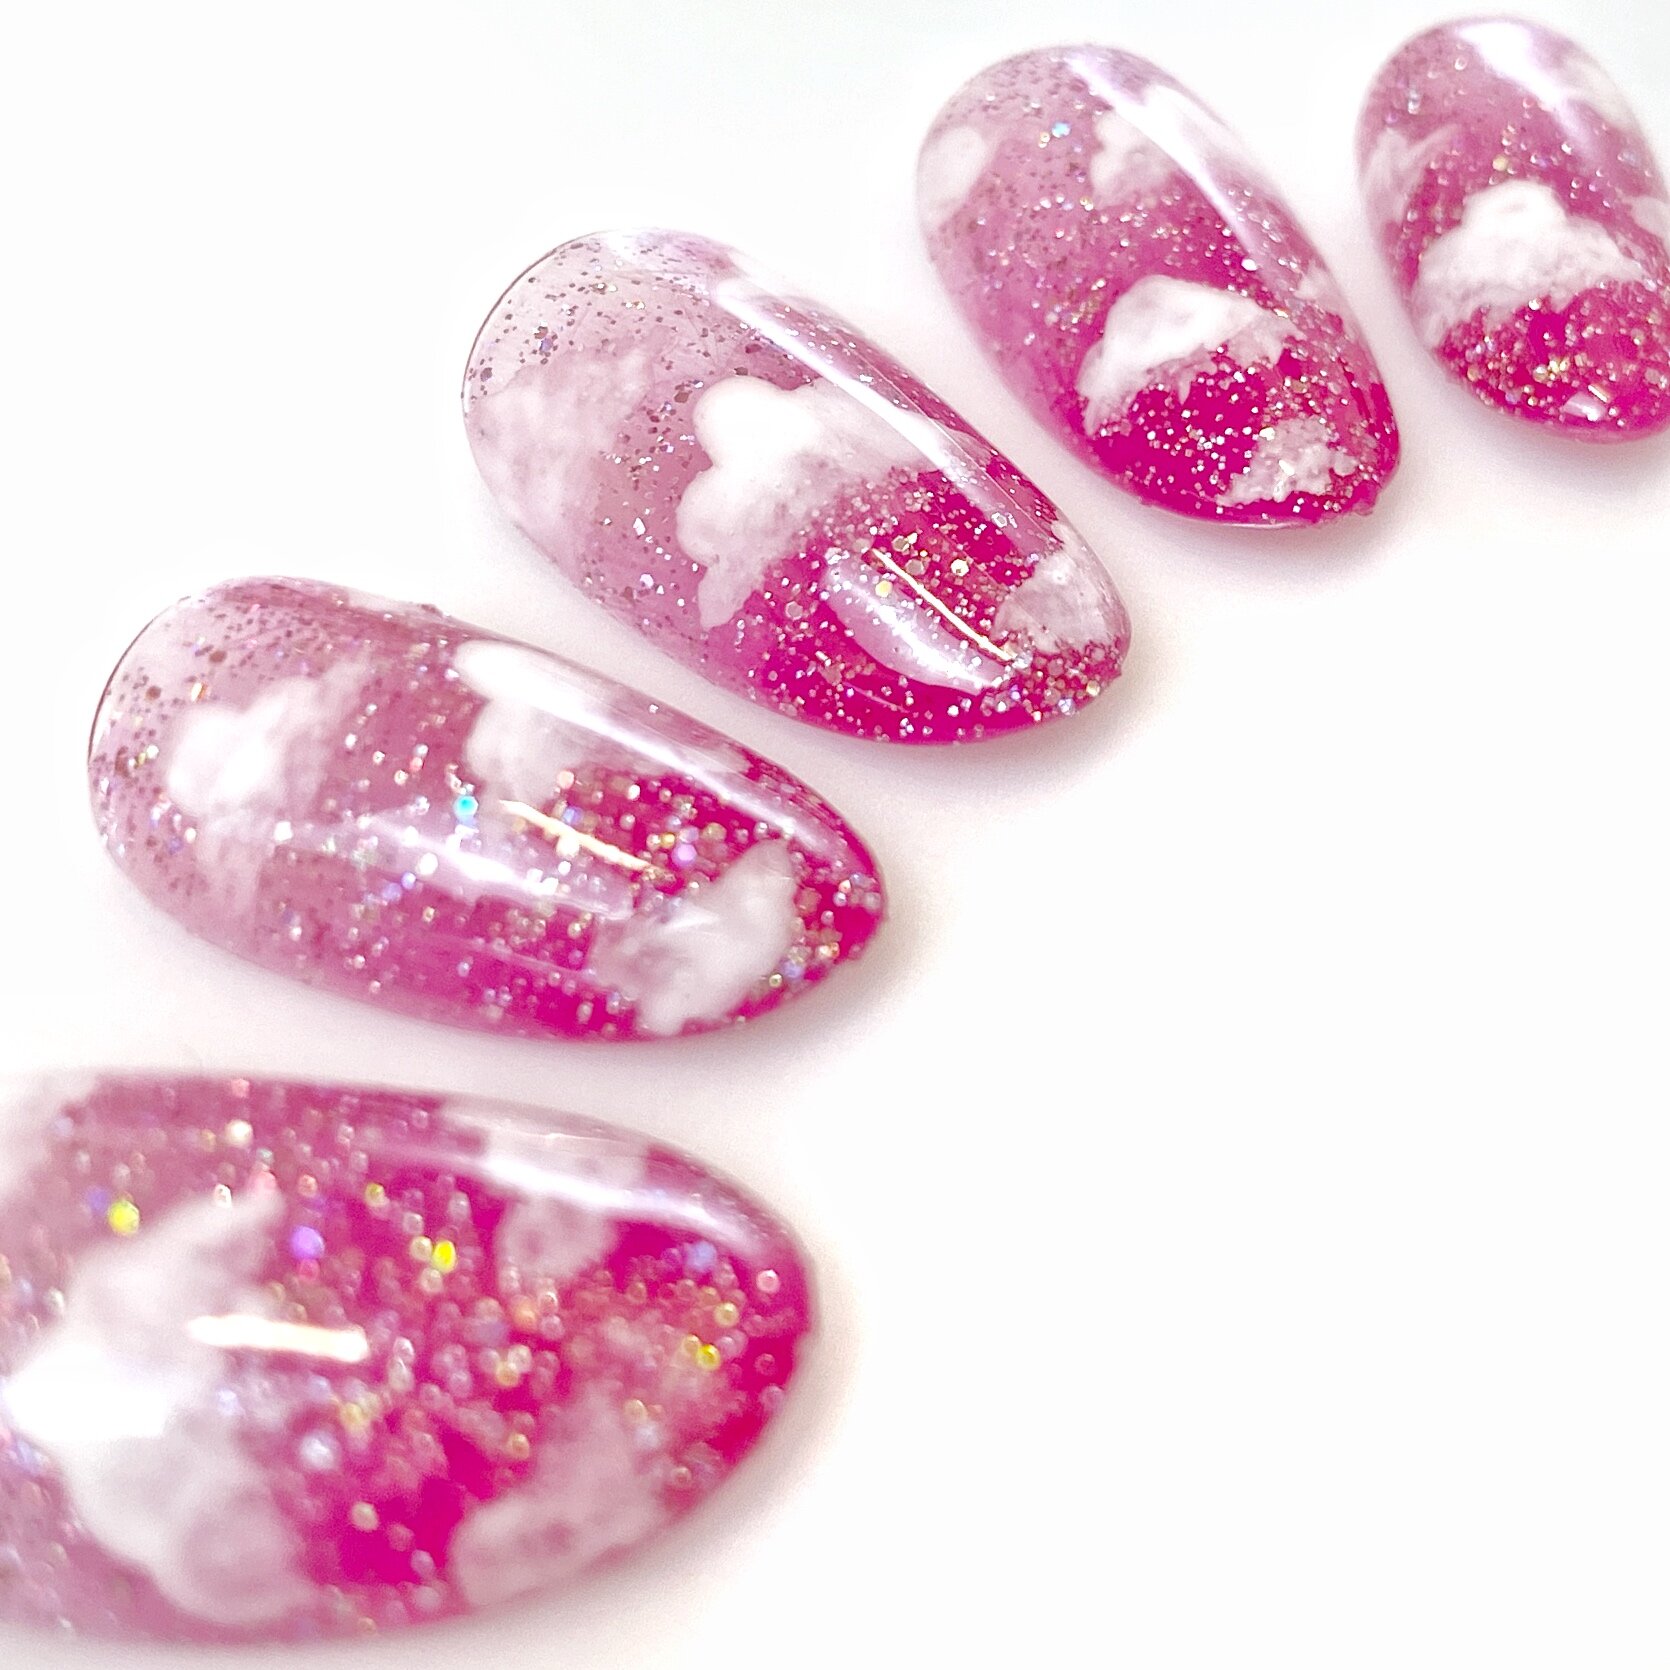
Strawberry jelly skies for days- also, I cannot help but hear “Watermelon Sugar” by Harry Styles on repeat in my head when I look at these beauts. Yes, we’re going to be doing a hand-painted-no-hacks-no-shortcuts ombré, but before you stress out- it’s also got GLITTER. We all know that glitter covers a multitude of sins. Now, add some fluffy marshmallow clouds and we’re in BUSINESS.
Why is this ombré easier than others? Well, first off, pink and white baby boomer gel ombrés are crazy hard so, we, as a nail community need to stop judging our ombré skills on failed baby boomer attempts. Also, if you can easily do a gel polish baby boomer without shortcuts or hacks, l will pull a full-on Wayne’s World “we’re not worth” at your feet. This ombré is easier because we’re using colors that aren’t in competition with each other- we’re blending a creamy lipstick pink into a clear gradation gel and then topping that gel with a sheer pink glitter to bring it all together. I need you to promise me that you won’t overthink it. Work in layers and use a light touch, you got this.
First things first, here’s what you’ll need to complete this look. Ageha Gradation Gel Clear, T-Gel Color Gel in D085 Vintage Pink, Presto Color Gel (Bottle) #26, Presto Color Gel (pot) #4, Kokoist Ultra Glossy Non Wipe Top Coat , Kokoist Flat Brush, ManaNails x Nail Partner Art Brush and Nail Thoughts x Kokoist Smoosh Brush.
Heart On Your Sleeve, Red On Your Fingers
This post contains product that was gifted for promotional consideration. For more information, please see disclosure statement.

“Red, for valentines day, revol-uuuuu-tionary.” Listen ya’ll, we aren’t reinventing the wheel here; reds and pinks are forever favorites ANY season of the year. But today, TAH-DAY, we’re talking about my favorite hues for the month of love.
Whether you’re in it to win it with a class bold red or ready for something a little different with holographic pink glitter- I got you covered.
Sally Hansen Insta-Dry Nail Color in ASAP Apple ($4.50) - This one isn’t going to last the longest on your nails, but it’s a one and done- quick dry, gorgeous proper balanced red.
Dazzle Dry Nail Lacquer in Perfectly Plaid ($18) - This red is a little on the deeper side but you won’t find a longer lasting lacquer system on the market. It’s part of a system, so in order to get the long wear you’ll have to use the base and top coat as well but it’s definitely worth it.
Dazzle Dry Nail Lacquer in Soft Caress ($18) - A sweet lavender-toned cool pink, kind of reminds me of conversation hearts. This one is also part of the Dazzle Dry system as mentioned above.
Cirque Colors Nail Lacquer in Madder ($14) - Who doesn’t love a show-stopping HOLOGRAPHIC red. Yes, you heard right- it’s a red polish infused with super fine holographic flakes and trust me, when it catches the light it’s mesmerizing.
CND Vinylux Weekly Nail Polish in Pink Bikini ($14.50) - Literally, this is the perfect creamy pink. Bright, but not obnoxious and looks great on every skintone.
Essie Gel Couture in Rue De La Ruby ($11.50) - A perfect raspberry red for those that prefer a cooler tone to their reds. This collection as a whole is really impressive and I love the brush.
OPI Nail Lacquer in Big Apple Red ($9) - A true original favorite and probably the most perfect red to have ever have red. It’s fairly balanced, but leans a TOUCH to the warmer side of the color spectrum. This ones been in my bathroom vanity for at least a decade and you’ll have to pry it from my cold, dead hands if you want to take it from me.
Triple O Polish in Sirius A ($11) - Glitter polish is easily my favorite- it dries fast, is super duper forgiving and chips are hardly noticeable. This is the perfect pink sparkle to get you into the season.

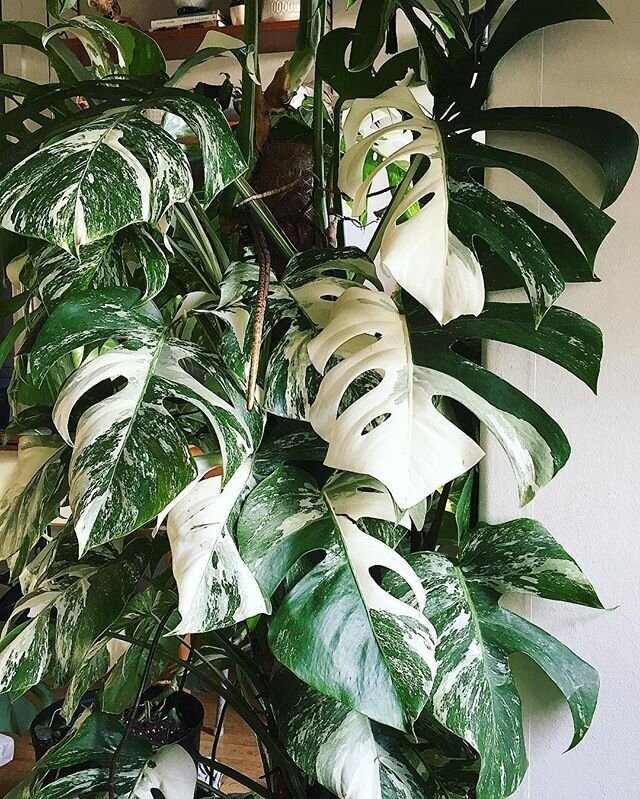
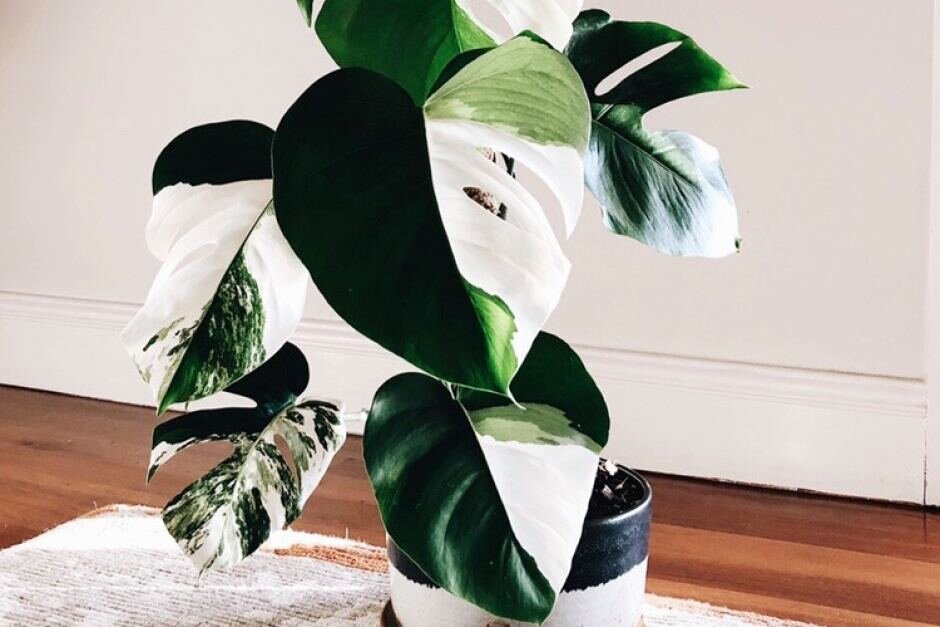
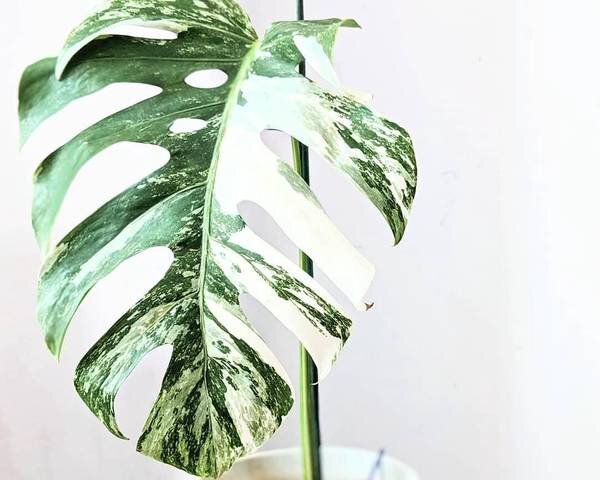
Variegated Monstera Nail Art Tutorial
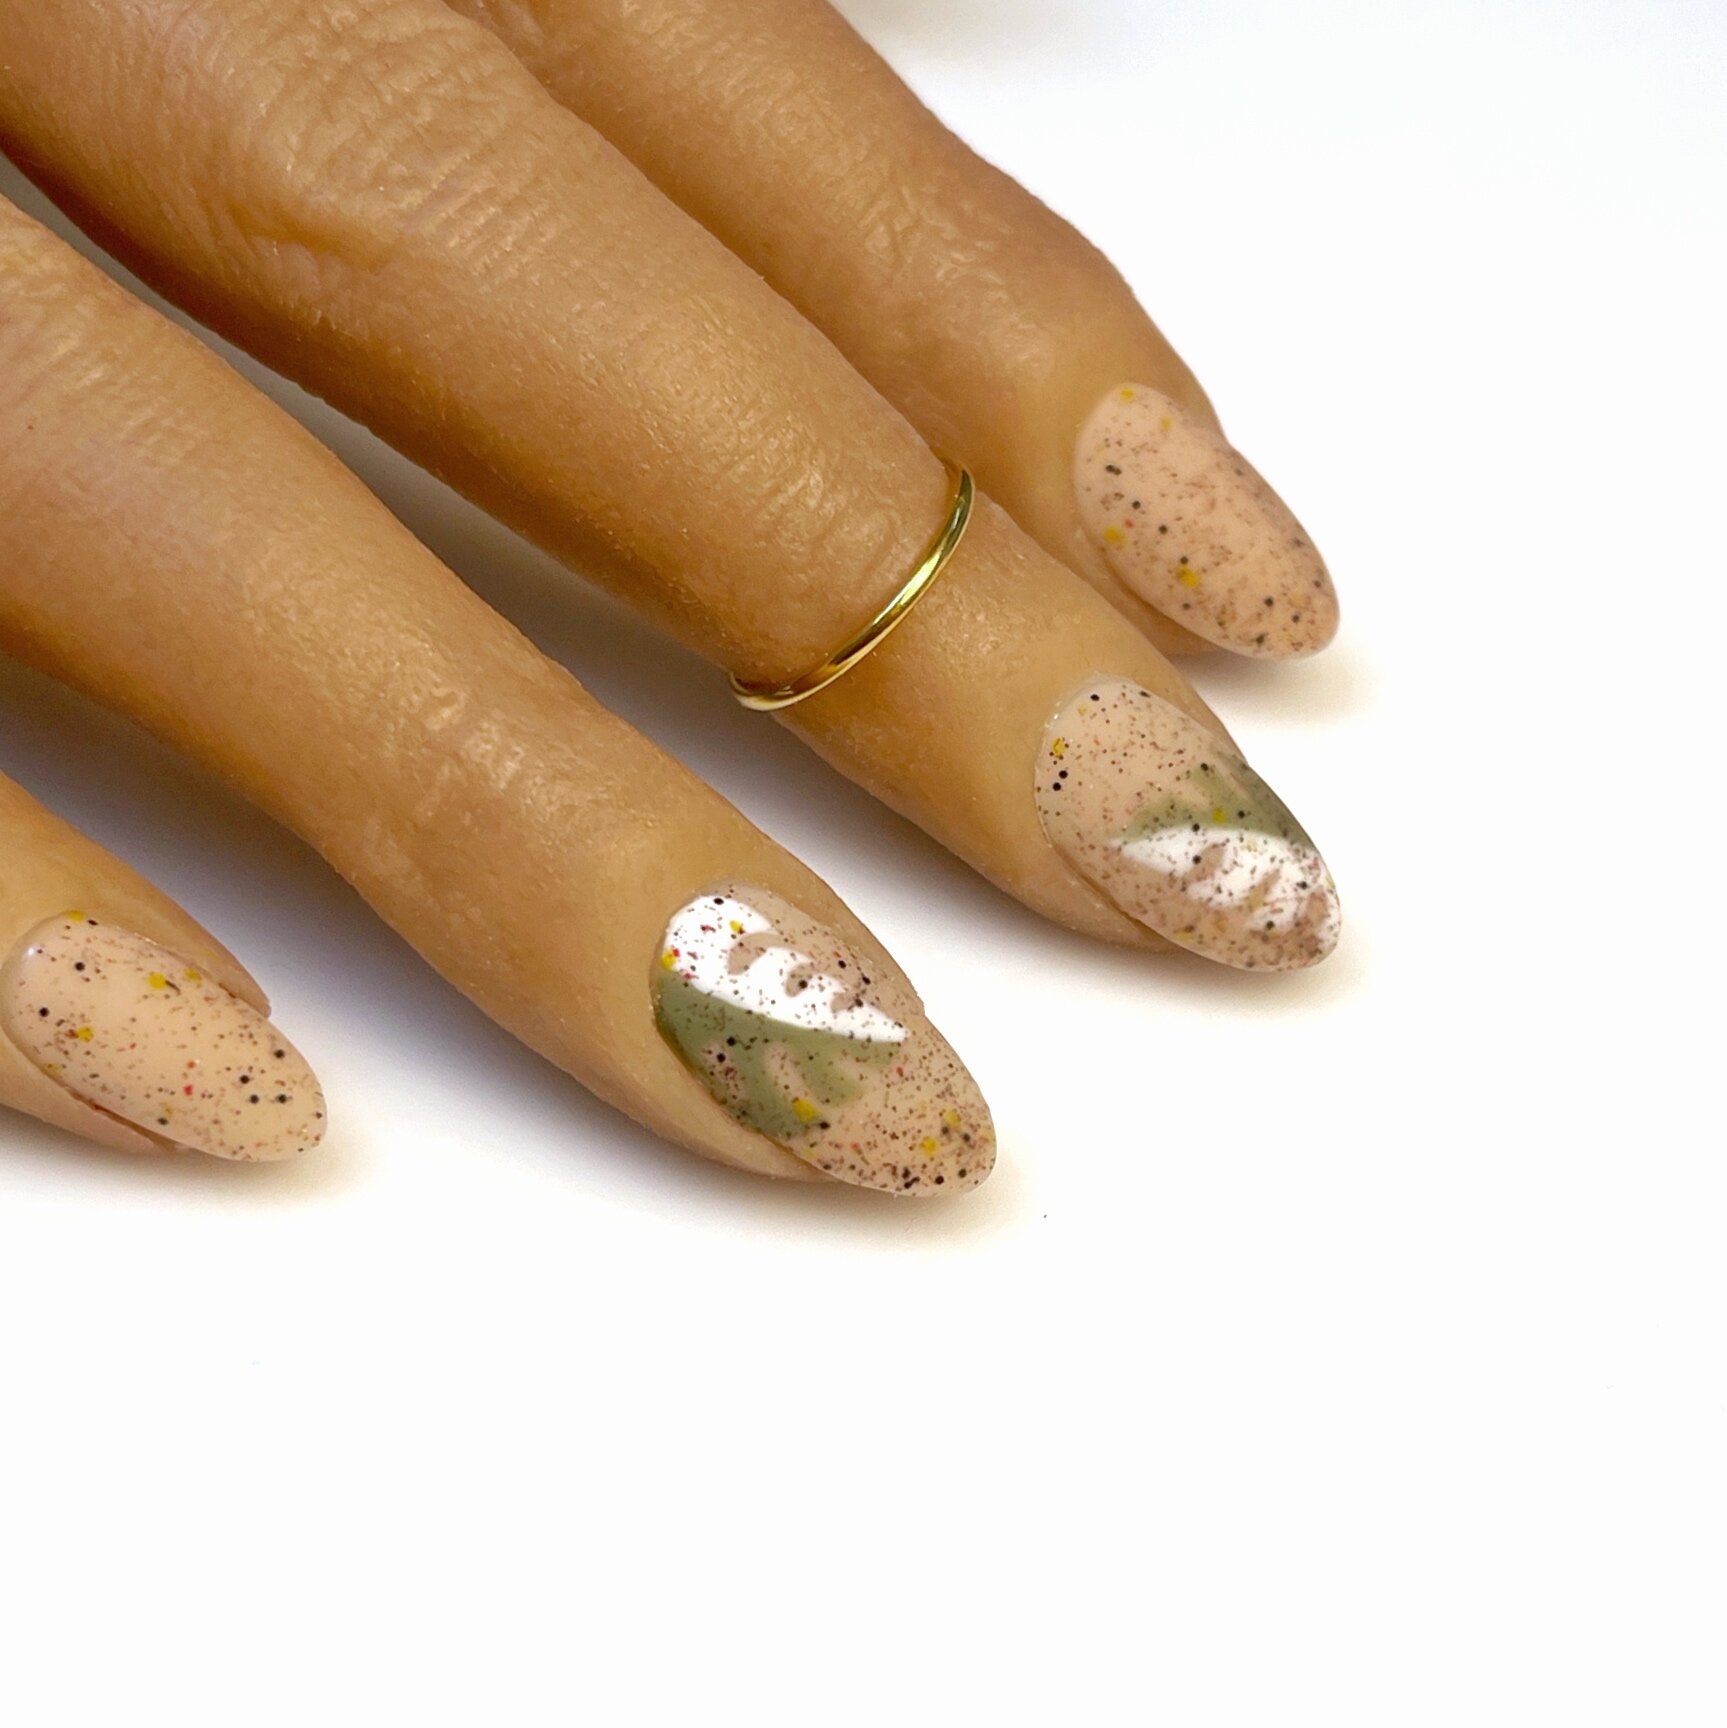
If you have found yourself on Plant TikTok or Plant Instagram lately, you’ve for SURE seen these rare and coveted mutant monstera plants. I too have spent a bit too much time on Etsy cruising for affordable clippings (FYI the cheapest I’ve found are upwards of $300)- so don’t worry, you’re not alone.
So, instead of spending an inordinate amount on clippings, let’s create some nail art. Because it’s 2021, we really can have it all. Also, I am fully obsessed with the From the Nail Cereal Glitter gel, it creates the perfect speckled ceramic vibe. I also opted for an easy to draw stylized monstera, that I promise, you’ll be able to recreate with a little bit of practice.

Disco Darling Nail Tutorial
This post contains affiliate links, see my disclosure statement here.
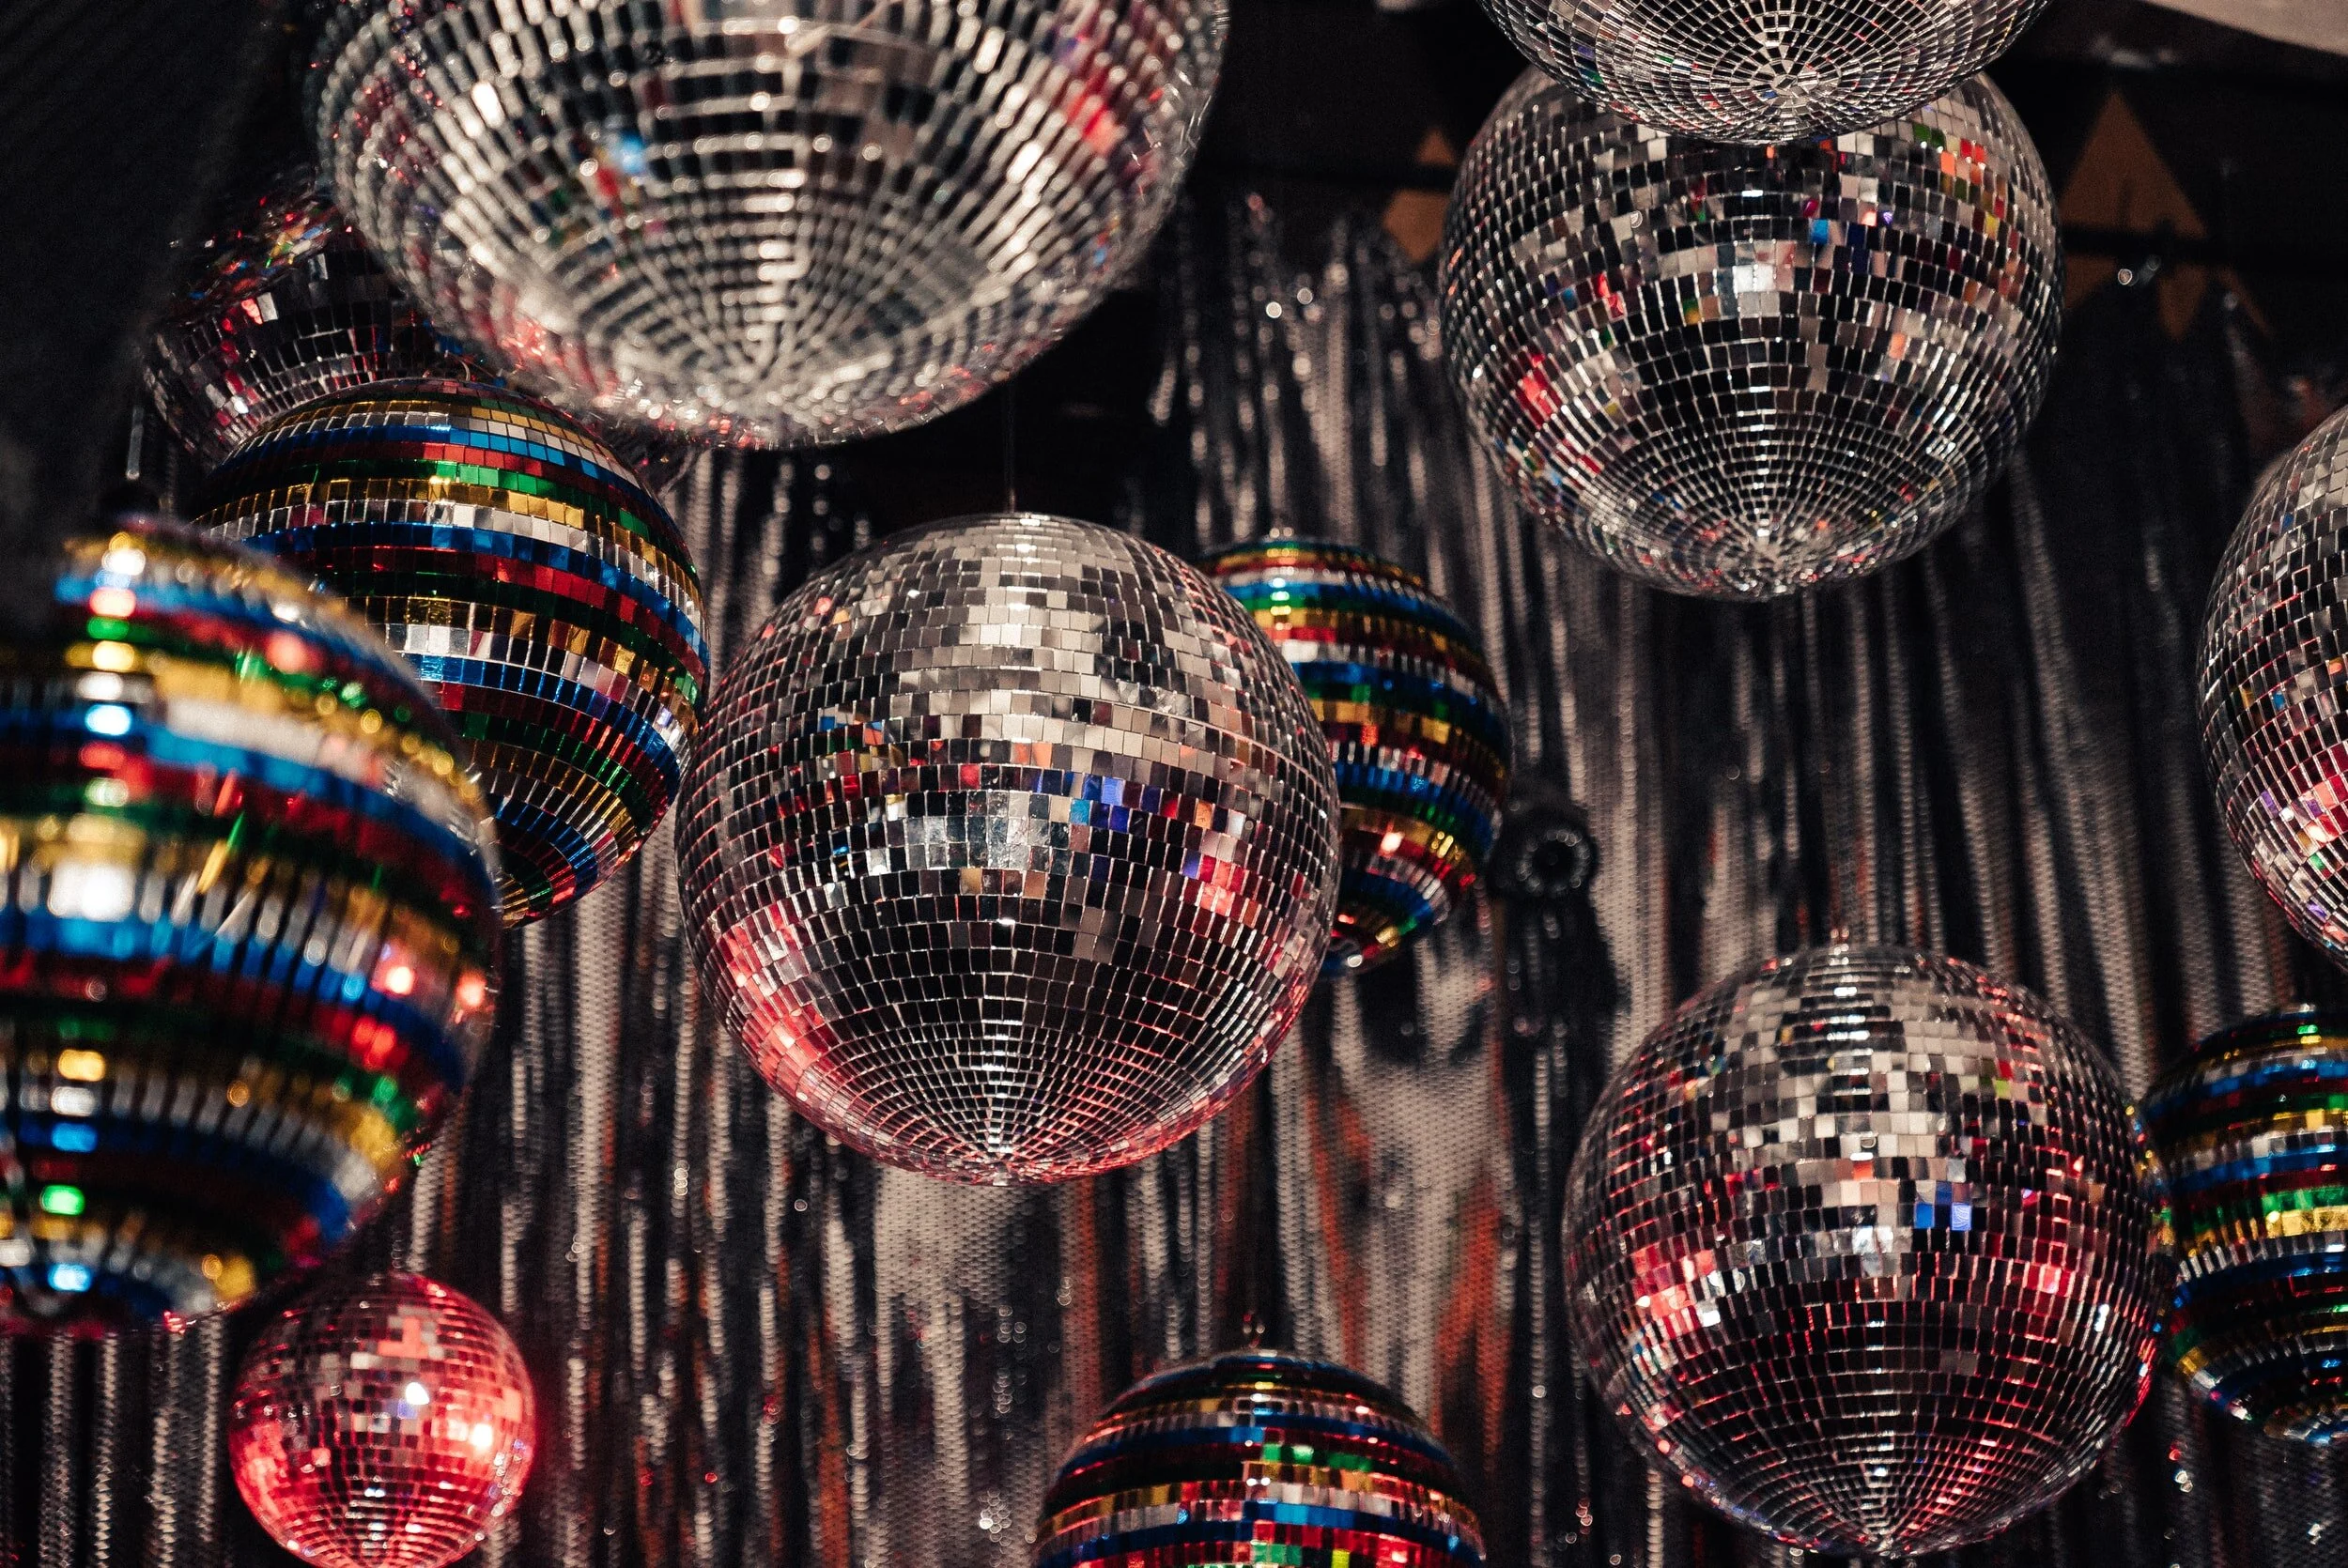
I have a feeling that once the world gets right-side-up again we’re all going to be wearing ballgowns to brunch. If my ever-expanding personal collection of bejeweled turbans is any indicator, we’re due for another period of excess like the Roaring 20’s or the 80’s. I don’t know about you, but I’m ready for a little bit of devil-may-care to balance out all of the doom and gloom as of late.

This look was originally inspired by these amazing nails that Natalie Minerva created for Doja Cat in the Say So music video. The moment I saw them I was on a MISSION to find those sequins and recreate.

Streamline Series: Swatch It Like It's Hot
This post contains affiliate links, see my disclosure statement here.

My studio was a swatch-free zone for a long time- I always hated the impersonal experience of going to the salon and pilfering through the basket of swatches or staring at a wall of polishes like the Sherwin Williams display at Home Depot. Without fail, I would just end up stressed out and say “uhhhh do you have Big Apple Red? From OPI?” and cross my fingers that the manicurist or front desk person knew what I was talking about. Suffice it to say, it was not the kind of high-end guided artistic collaboration I wanted to have with my clients.
I always had an immense amount of pride in “knowing my collection” so if a client wanted a red, I wouldn’t show them EVERY red- I’d show them a few and then pare down from there or figure out what direction we wanted to go in without being overwhelmed by choice.
During the first round of closures out here in California, I had the epiphany- I didn’t have to choose one or the other, I can do both in a way that works for me and my artistic process.
Most importantly, it gave me something to do while my studio was closed. Swatching my gels gave me new perspective on my collection- it helped me realize what colors I was buying too often and what colors/finishes were lacking. I also found these amazing swatch palettes at my local nail supply (so if you’re in Orange County, you can grab them at Skylark- if you’re not, here’s an Amazon link) that were wayyyyy less cumbersome than traditional swatch sticks.
With the new COVID safety guidelines (although, not all that different from how I already ran my studio) came out- streamlining my appointment timing became paramount. Then the epiphany happened: I should put these online. By putting my swatches online, my clients won’t feel the swatch stress in my studio, and neither of us will have to pour over which pink is the “right pink” for twenty minutes of an hour appointment. Which, TBH, will still happen from time to time (you know who you are).
So it’s a new year, a new opportunity to streamline and work smarter. What steps are you taking in the new year to streamline your service experience?
Here are some links to products that have helped me streamline my swatch process:
1/4 Inch Black on Clear Label Tape
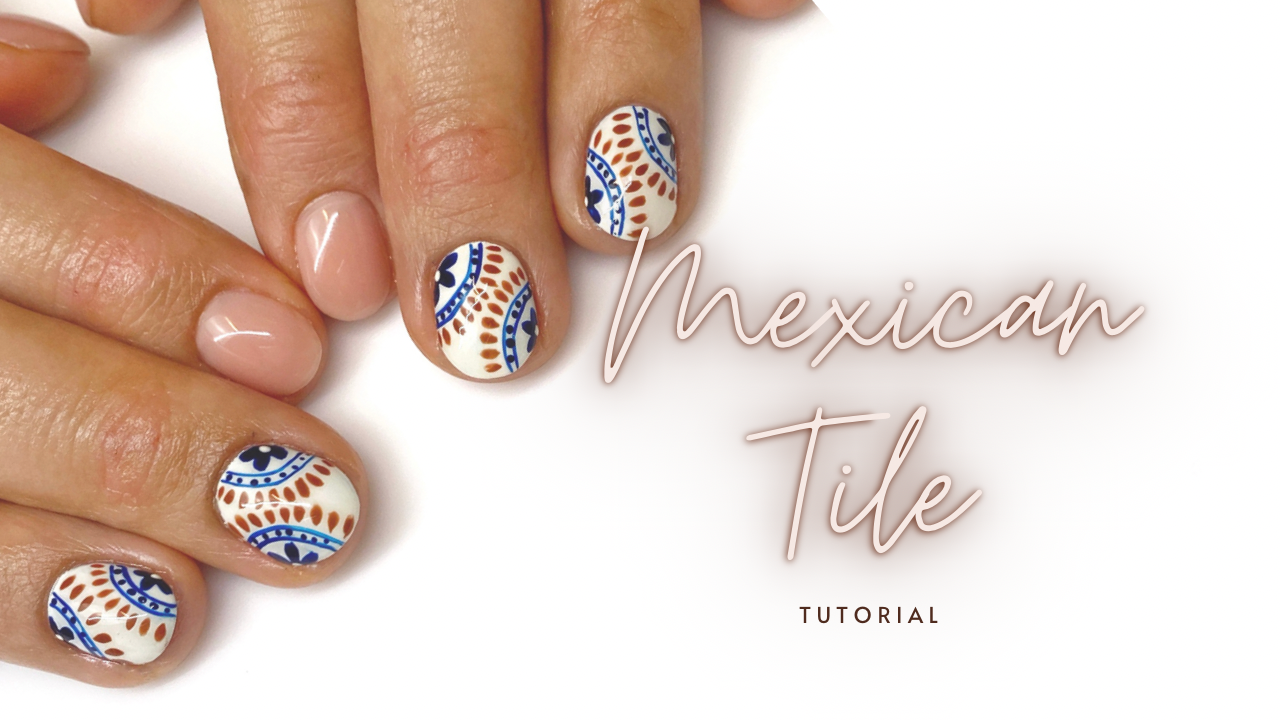
Mexican Tile Nail Art

Growing up in Southern California meant that i spent a lot of time in Mexico as a kid. Truly some of my best memories were browsing artisan shops with my mom or stopping at roadside eateries with my dad. To this day, nothing evokes a sense of nostalgia for me quite like that distinct smell of Mexican leather.

In case you were wondering, I was never not a ham.
Last year I went back for the first time in over a decade and the memories from that trip still live rent free on a loop in my brain. It’s an insanely beautiful country and I’m proud to be of Mexican descent. Truly, I cannot wait to go back. Until then, let’s do some nail art inspired by the pottery markets and create some Mexican tile nail art.


You can totally put your own spin and mix up the colors (and I hope you do, please tag me because I wanna see!) but for me, the traditional off-white, blue and rust palette just hits different.
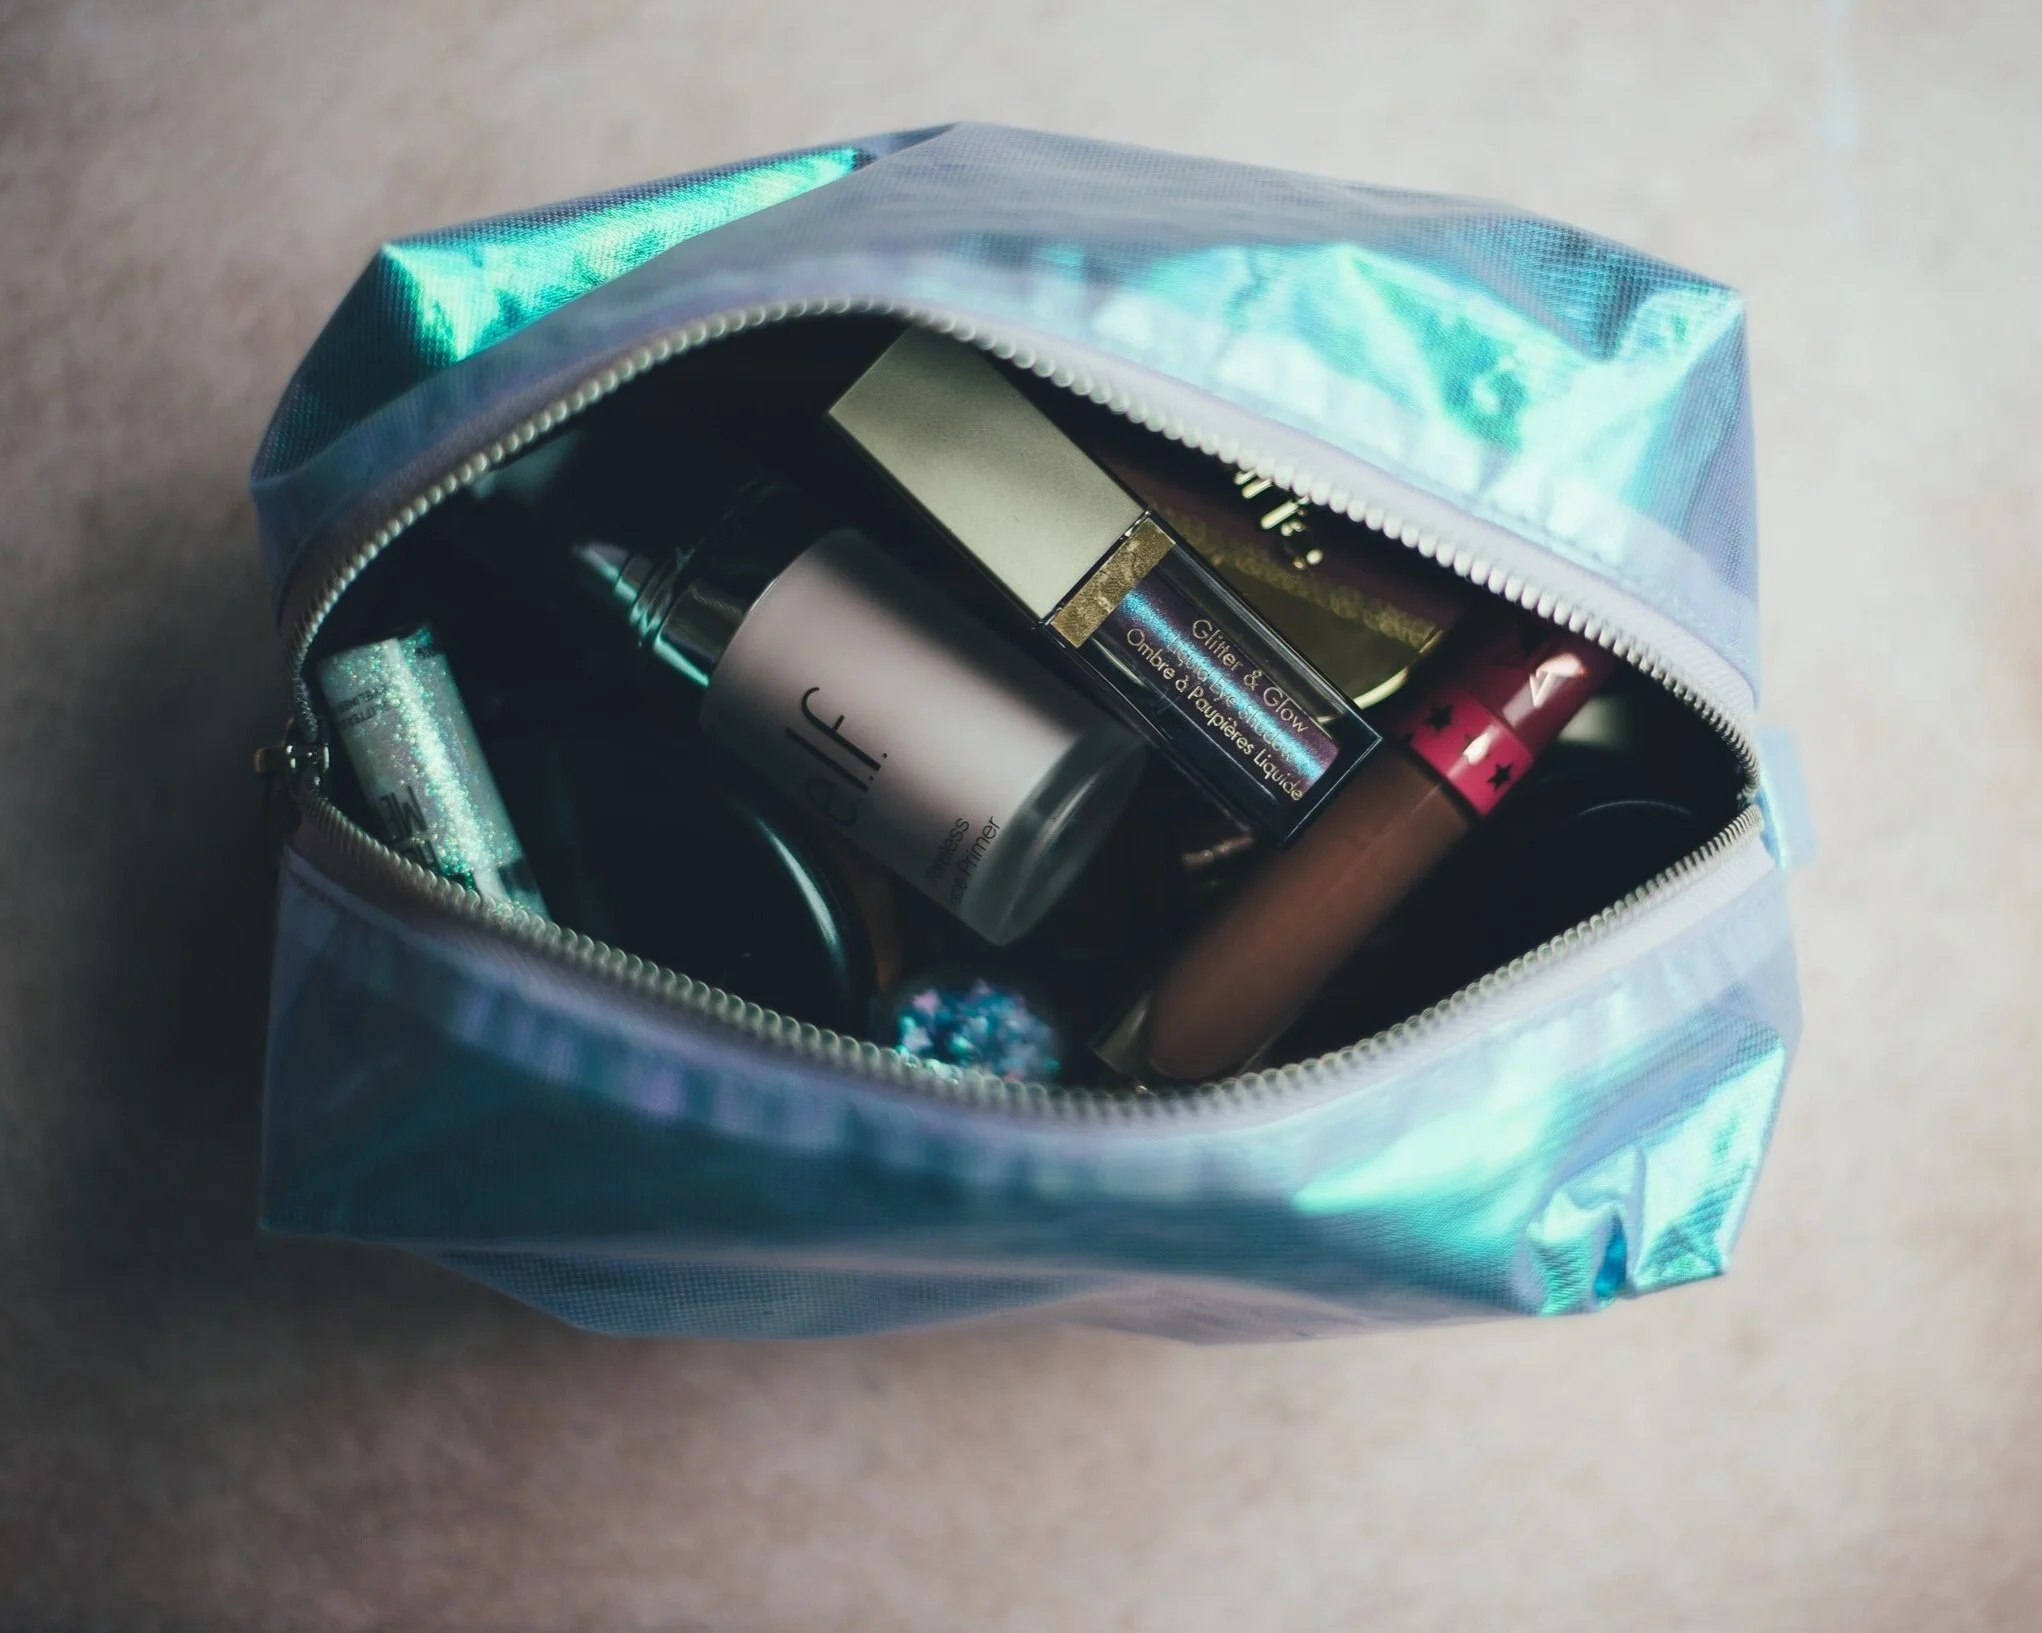
Model Bag Must-Haves
This post contains affiliate links, see my disclosure statement here.

Model: Ashley Nedd, Photo: Caitlin Fisher, Manicure: Rachel Messick
I worked as a make-up artist for a really long time before I ever picked up a bottle of polish (professionally) and ventured into manicuring. The amount of times that I (as a makeup artist) was expected to paint and maintain nails was honestly astounding- especially considering I had zero experience and could barely paint my own nails (there is AMPLE and cringey photographic evidence of this in my personal Instagram).
Now that I’m on the nail side of the looking glass, I get to hear all of the horror stories from my model friends about being ditched at the end of the day with press-ons and no clue how to remove them or a sculpted 2 inch acrylic extensions that have been pried off with dental floss and throbbing nails (these are both real life stories, FYI). I also see the relief from photographers when they know they aren’t going to have to photoshop a fill on 4-week old white gel manicures (seriously though, it’s ALWAYS white manis). Trust me, I’ve had my share of learning experiences on set as well- so I’m not here to bash anybody. I’m here to share my absolute must-haves so that your nails aren’t the distraction of the shoot.
First Things First, the best advice I can give, from a manicurist perspective is to keep your nails clean and tidy and if you want to do gel, be sure it’s something that can be soaked off relatively easily and stick with simple nudes or clear. Dip and acrylic are both incredibly time consuming to remove and hard gel cannot be soaked off. Honestly, though, if you know you have busy seasons- just avoid anything other than nail polish or easily removable press-ons.
I’ve separated the list into two categories: things to have on hand at home and things to add to your travel bag.

Things to have at home:
100% Pure Acetone: If it’s on your nails and removable, it’s coming off with Acetone. Buy a big bottle, store in a cool dry place.
Nail Clippers: If you find yourself with long nails that you’d like to remove, you’ll want to clip the length down as much as possible before you try to soak them off. Trust me, it will make your life MUCH easier.
Removal Wraps/Foil: For wrapping and soaking off gel, acrylic, dip, press-ons, etc…
Cotton: For product removal and saturating in acetone, removing nail polish, etc…
High Quality Nail File 100/180: Use the more coarse side to file through product as much as possible before you soak off and the finer side to shape your natural nail.
Nail Clippers: These are optional on set, but essential at home. If you find yourself with long nails, you’ll want to cut the length down BEFORE you file and soak. It’ll save you a lot of time and energy.
Conair Warming Mitts (Optional): Warmth helps acetone work faster, so if you’re settling in for a soak off, pop your hands in the mitts and turn up the heat- it’ll cut time off significantly. For a more low-tech option, you can also wrap your hands in warm towels instead- you’ll just have to reheat them when they get cool.
Things To Travel With:
Press-On Tabs: My personal favorite are the Dashing Diva Virtual Bond tabs. They are super-strong, easy to remove and they won’t pop off while you’re changing outfits. Truly, they are the only tabs I’ve used that will stay on for multiple days if prepped properly- should you choose to keep your nails on.
Nail Guards: These are also by Dashing Diva and they are SO underrated and I love them so much. You place them on your nail before you apply an enhancement (press-on, acrylic, gel, basically anything that’s not nail polish). Once you’re ready to take them off, you simply soak in warm water and gently pop off the enhancement with an orangewood stick. No damage to your natural nails.
Cuticle Pusher: This is something you should have at home and in your travel bag. Use this to gently push cuticles back before applying any product for a cleaner application surface.
Orange Wood Sticks: These cuties are multi-purpose- you can use them to clean under your nails and also to clean up any wet polish that creeps into your sidewalls (that crease between your nail plate and your finger skin).
Nail Brush: Honestly, we should all have nail brushes in our purses. Use it to scrub your nails and clean underneath. Hygiene, baby, it’s a beautiful thing.
Pre-Soaked Alcohol Pads and Polish Remover Pads: I usually pick them up at Target, but you can find them at most drug stores. They are pre-soaked pads wrapped and sealed so you don’t have to deal with any spills. The alcohol pads are great dehydrating the nail plate so that you can apply product after using oils or creams, the polish remover pads are, well, for removing polish.
High Quality Nail File 100/180: I’m not talking about cheap emery boards, get a nice high-quality file. Grab a few and switch them out once they get dull. The more coarse side is for product removal, the finer side is for shaping your natural nails.
Medium Grit buffer (180/240): This is going to help with any odd surface texture or to smooth rough edges after filing. Use it in moderation, it’s nice to have a smooth nail but don’t do it too often.
Cuticle Oil: Grab a cuticle oil pen and use it to hydrate and prep nails before application and after. Just use it all the time, it’s literally a miracle.
Hand/Body Lotion: My personal favorite to use on set is Body Hero by Glossier. It has a lovely scent and just a HINT of opalescence that’s SUPER flattering on camera.
Hand Scrub: Hand scrubs are the easiest way to fake supple skin. The grit will exfoliate all the dead and dry skin (because hello, we all have zombie hands now from washing and sanitizing all the time) and they are usually paired with some sort of humectant to infuse moisture and make the hands look extra soft and supple on camera.
Nude & Clear Polish: Throw them in a plastic baggie before you put them in your bag (just trust me on this), grab your favorite sheer nude (something with enough color to hide imperfections and create a more uniform surface) and a simple clear polish. Some of my favorite universal nudes are: Sugar Daddy by Essie and Nourishing Nude by Orly.
Shiny Buffer (Optional): If you prefer to not wear polish at all, you can always run a shiny buffer over your clean nails to amp up the shine sans additional product.
Quick Dry Top-Coat or Spray (optional): Quick dry spray or top-coat will help your nails dry faster so that you can get dressed without smudging.
Nail Clippers (optional): Just a good idea to have on hand, although if your nails are on the shorter side you can omit this.
Press-On Nails (optional): Whether it’s custom or drugstore, something quick and simple that can be easily popped on and off. This one is super optional, but it’s nice to have the option when you’re doing creative shoots OR if you happen to be a nail biter.
Now go forth and model with those fabulous nails! I hope this serves as a starting off point to advocate for yourself and your nail health. Also, don’t share tools on set, and if you are a beauty pro, be sure to not share disposables between clients and that you are properly disinfecting all reusable non-porous tools.
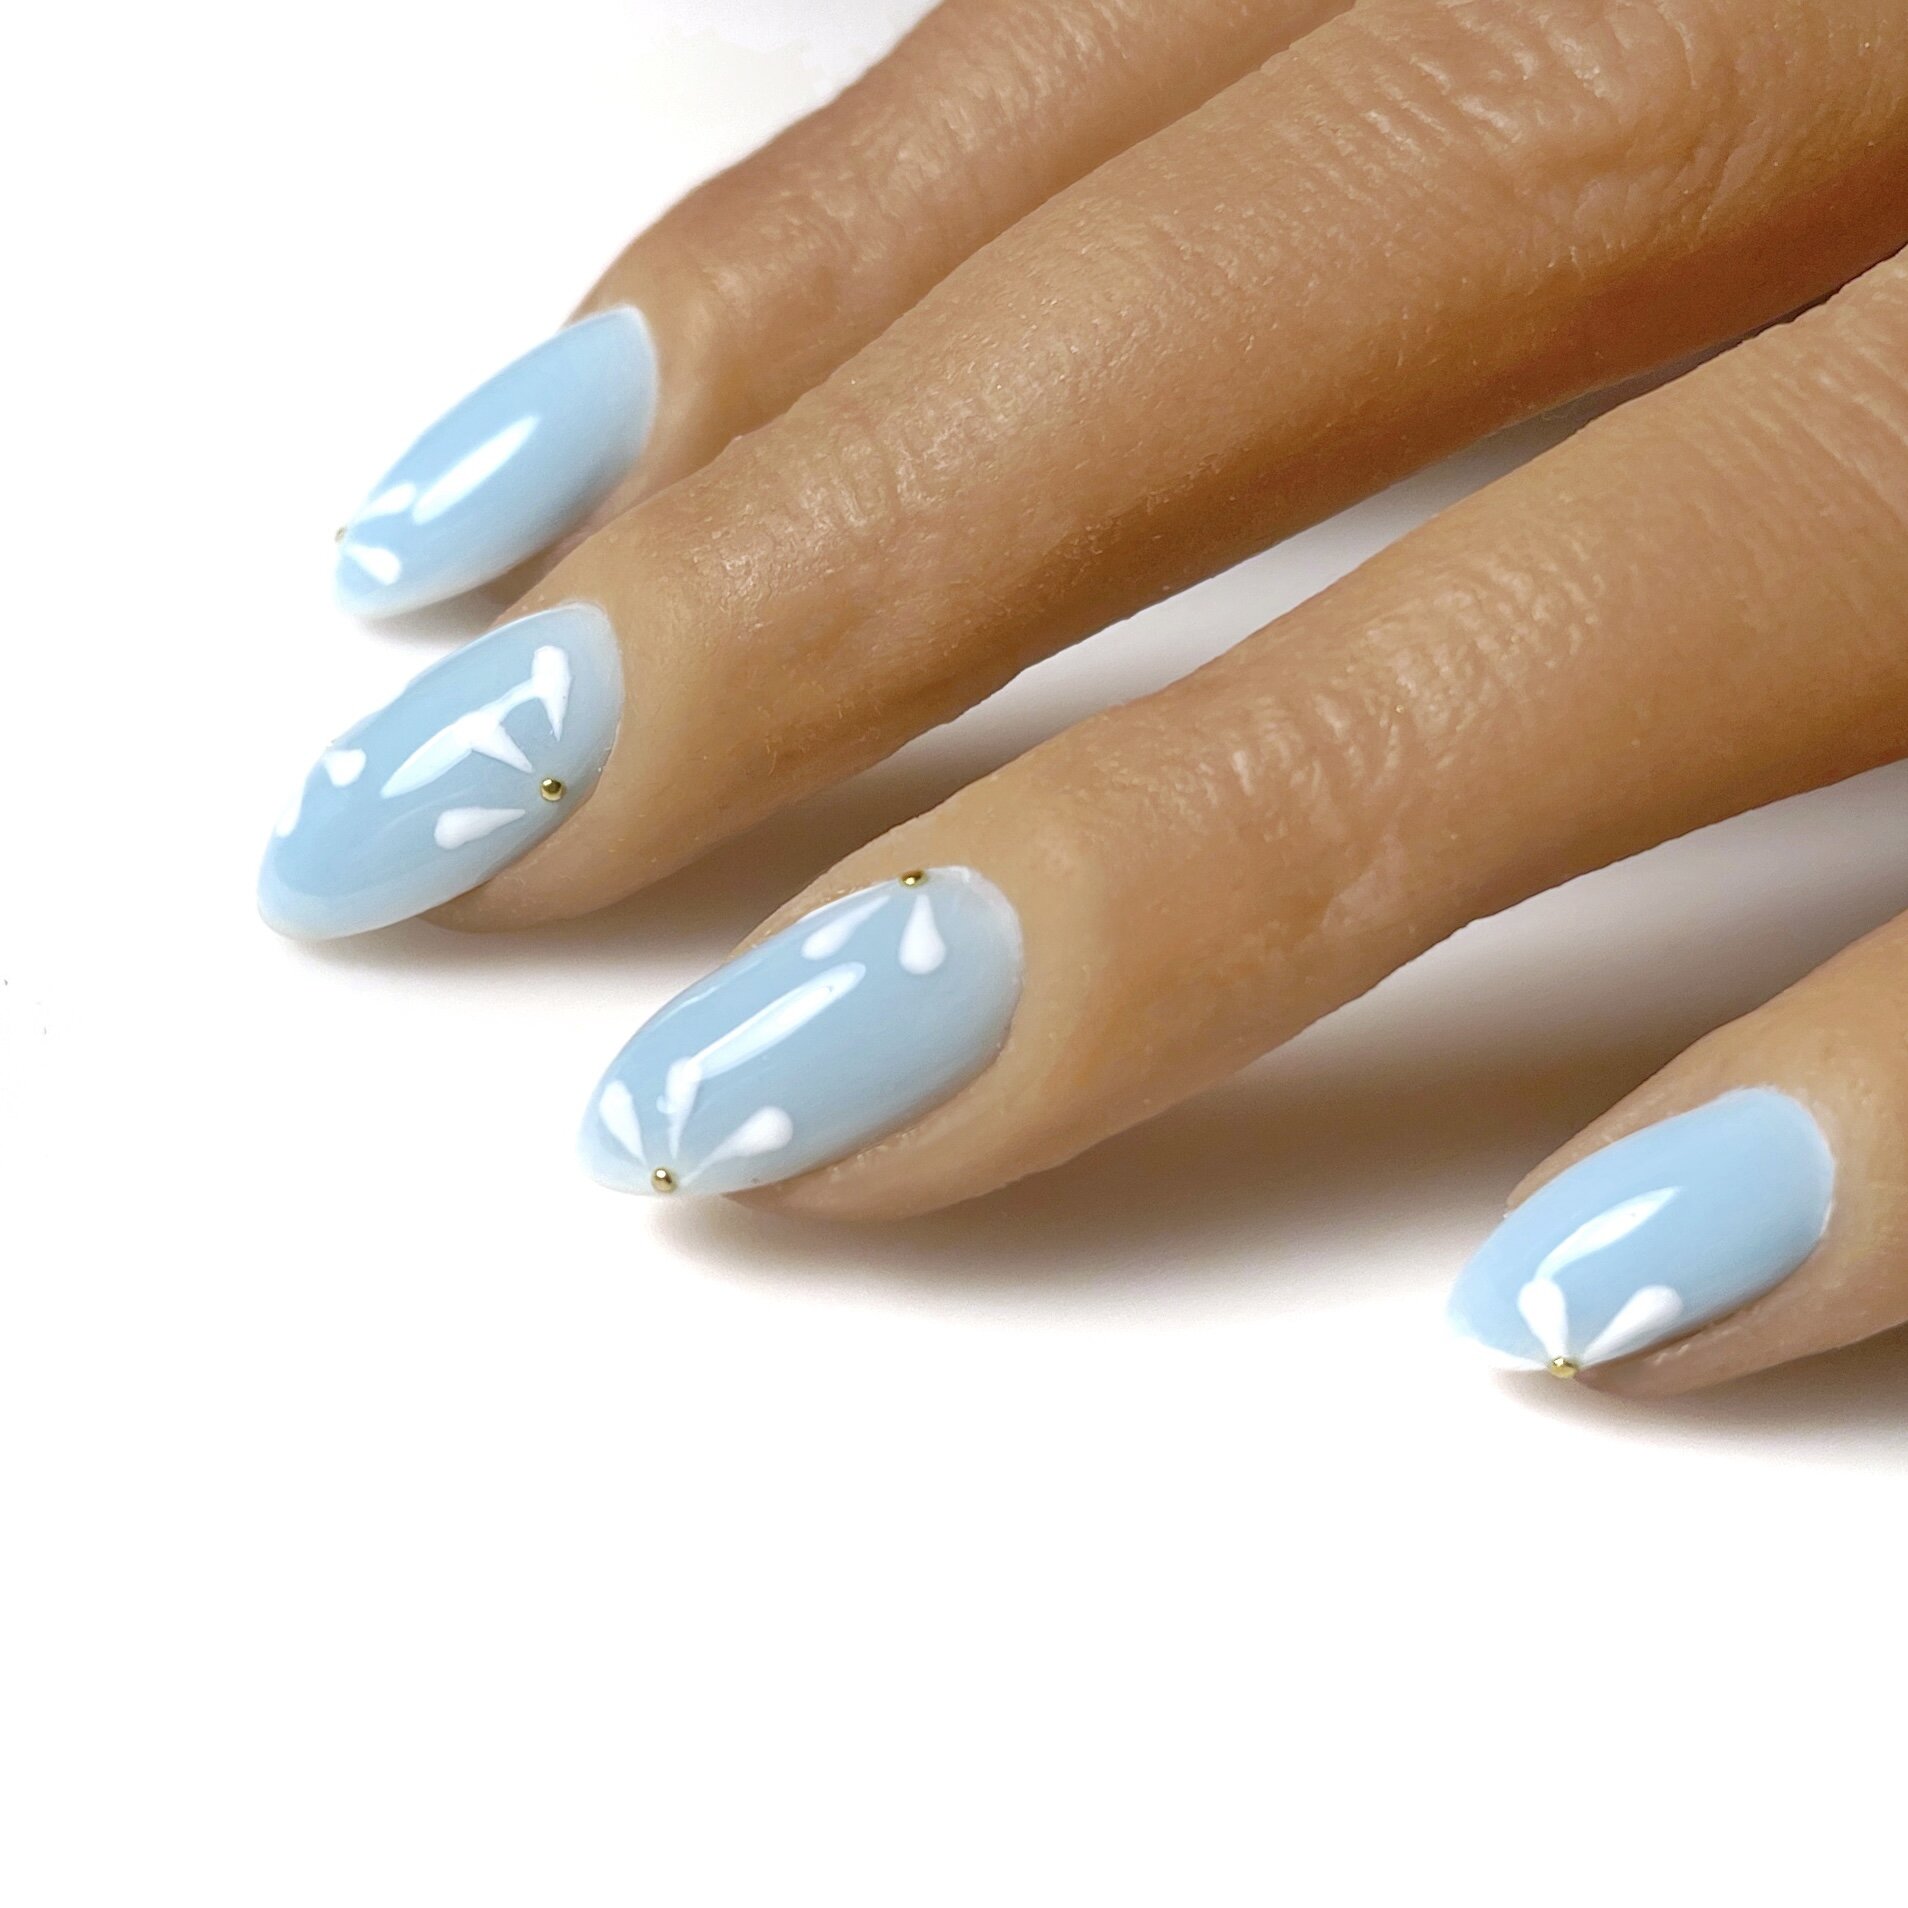
Sky Daisies Nail Art Tutorial
This post contains affiliate links, see my disclosure statement here.
Remember in the nineties when we all wanted to look like we were in the seventies? Everything down to polyester button ups and bell bottom jeans, not to mention the ever-present sunflowers and daisies. Seriously, I had SO many shirts and skirts with daisies on them- the more retro, the better. It seems, the nineties are most certainly back, at least if you ask the local youths.

Seventh grade 1996 Rachel LIVED for a daisy moment and of course I wasn’t smiling because a) it wasn’t cool to smile in the mid nineties and b) braces.
Admittedly, I’m a creature of habit when it comes to color and my clients can be as well and my Luminary nude collection is easily the most popular in my studio, now that spring is just around the corner I’m excited to dive into this sweet baby blue called Dream. As the name would suggest, it is, in fact quite the dream. Dream is also Cranberries song from 1993, so CLEARLY this look and this color were meant to be.
If you like to rebalance your Luminary vs a full soak off, don’t sweat it. Be sure to apply a generous layer of Clarity (clear) as your first coat, cure and then build your overlay on top of that. When it’s time to do the ol’ switcheroo just file till you get to your clear buffer layer and rebalance with the color of your choice.
Dream is the color of the month for January 2020, you can shop via my distributor My Nail Stuff using code RACHEL to save 10% on Dream as well as 10% on Erica’s ATA and Dulce Nail Sprinkles.

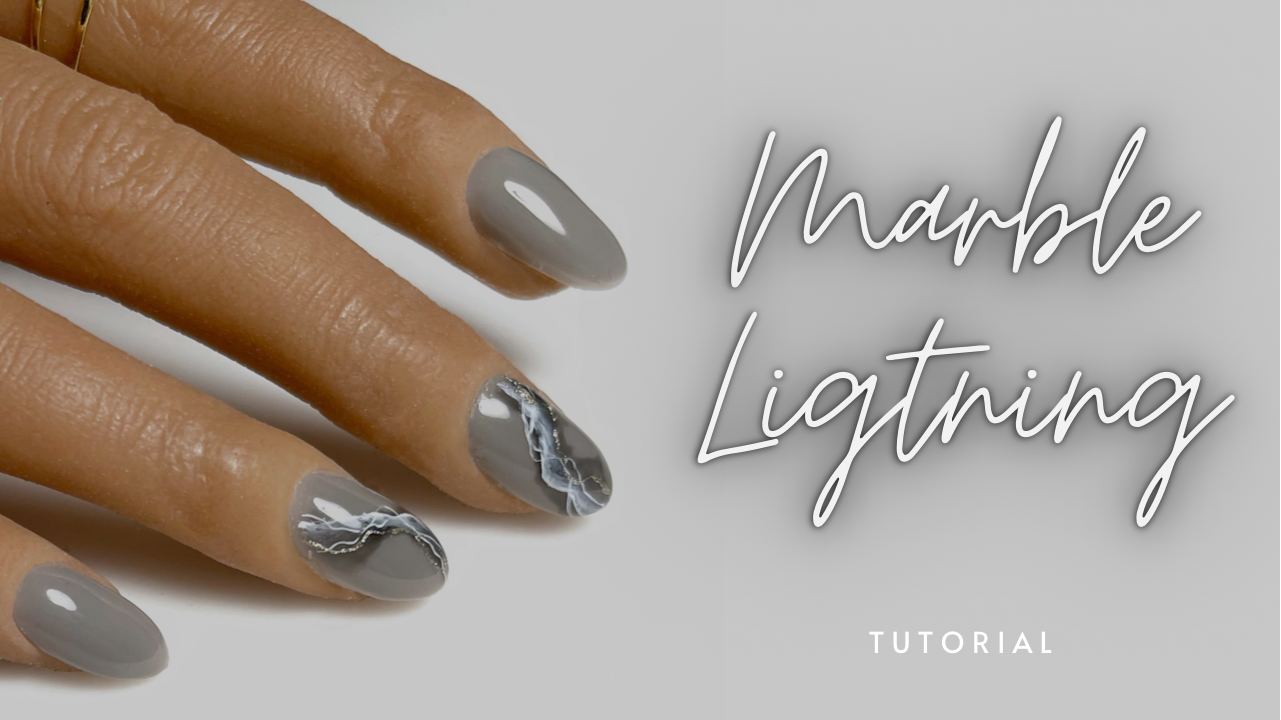
Marble Lightning Art Tutorial Featuring Essence by Luminary
This post contains affiliate links, see my disclosure statement here.

Manicure by Rachel Messick
Luminary is my number one desert island product in my studio. Often immitated, never duplicated. I was beyond stoked when Kelly Van Dahl, the owner and creator of Luminary, reached out to me to try the newest addition to the Colors by Van Dahl collection: a gorgeous warm dove gray called “Essence”.I’m not going tp lie it was also a bit of a Sally Field “you like me, you really like me” moment, because, well, I’m an artist and a woman and imposter syndrome is REAL. The TL;DR of the matter is, it’s nice when a brand you love, loves you back.
Truthfully, don’t often reach for the non nude/pink members of the Luminary family, but, Essence might change my mind, she’s really cute. As far as technique, texture and viscosity- Essence hits all the marks of her brand-mates: strong but with flex, hard but not rigid or brittle. In my video below you can watch me do a basic Luminary overlay, however if you want proper education you’ll want to check out Luminary Educator Candice Green’s certification courses (she certified me and is also a personal friend, so I can vouch for her) if you’re wanting to give it a go on your own, check out the Luminary Nail Systems Youtube channel for tips and tricks.
Let’s get into some ART. For this look I’ll be using Luminary Essence (duh), Kokoist Color Gel in E-206S Black Martini, Ageha Sharp Liner in White and Akzentz Gel Play in Cosmic Silver. You’ll also want to grab your Luminary Commit Primer and Empower Top Coat. For tools, this look keeps it super simple- the only brushes you’ll need are the Kokoist Round Brush and the Nail Thoughts x Kokoist Detailer.
If you’re looking to grab some Luminary for your salon or studio, you can shop my distributor My Nail Stuff by clicking this link and using code RACHEL at checkout. You’ll save 10% of the Luminary color of the month, Erica’s ATA and Dulce Nail Sprinkles.
Prep School: Press-On Prep 101
2020 has been the year of the pivot. It’s challenged all of us in the nail industry to diversify our businesses- leading to an awesome and unexpected press-on nail boom. All of a sudden, us manicurists were left with a surplus of time we were not expecting to have and rent/mortgages that still came due on the first of the month. Necessity truly put creativity in full-force.
Moody Marble Nail Tutorial

Remember the Eighties Paradise nail tutorial that reminded you of your cool bachelorette aunt? Consider this her more masculine counterpart. We’re doing a different kind of marble today as we head into spooky season. A funky, rich, deep, black and gold moody marble worthy of the 1980’s wall street skyscraper lobby of our dreams.
Products Used:
Nail Thoughts x Kokoist Brush Set (Application, Detailer, Smoosh)
Kokoist Color Gel: E-188 Japanese Charcoal, E-206S Black Martini, E-1 Maxi White
Relevant Resources: Favorite YouTube Channels

There are three things I can credit with my foray into manicuring: my own sad bitten nails, my friend and former manicurist Sreynin and YouTube tutorials. I specialize in gel nail art on natural nails, so I won’t be of much use in the acrylic department (although I hear that Nail Career Education, Naio Nails and Young Nails are amazing resources.)
The Nail Hub: Gel Nail Fundamentals
Liz has an AMAZING series called Gel Nail Fundamentals, literally everything from anatomy to application.
Hillary Dawn Herrera:
Hillary is just one of those magical unicorn people with a gift for education. I love that she talks business and real salon scenarios as well. If you want more in-depth skill training, she also has a paid digital education library (I highly recommend her Speed Gel Removal class).
Paola Ponce Nails
Paola specializes in Japanese gel nail education, and is a great resource for business, basics and art. She’s my go-to when I have a Japanese gel question.
Light Elegance: Jim McConnell’s Chemist Corner
I don’t use a ton of LE in my studio (mostly their glitter gels), however, Jim is a super renowned chemist. So if you are an education junkie like myself and you want to know the ins and outs of chemistry, take a stroll over to the LE channel and get nerdy with Jim.
Celina Rydén:
Celina just has the BEST personality, her videos have something for everybody whether it’s basics, business or advanced techniques.
Mainee Nail TV
Mai Sakai is a super well known Japanese artist and her tutorials breakdown simple and complex art, step-by-step complete with subtitles and royalty-free background music that’s for sure going to get stuck in your head.
Isabel May Nails:
Isabel is a more recent discovery of mine, but I just love her tutorials and British accent. Here’s one of my faves!
Nails by Katie Dutra
Katie’s channel is super fun, great and honest vlogs, necessary tutorials (hello ombré!) and product reviews.