Sunset Ombré | Nail Art Tutorial
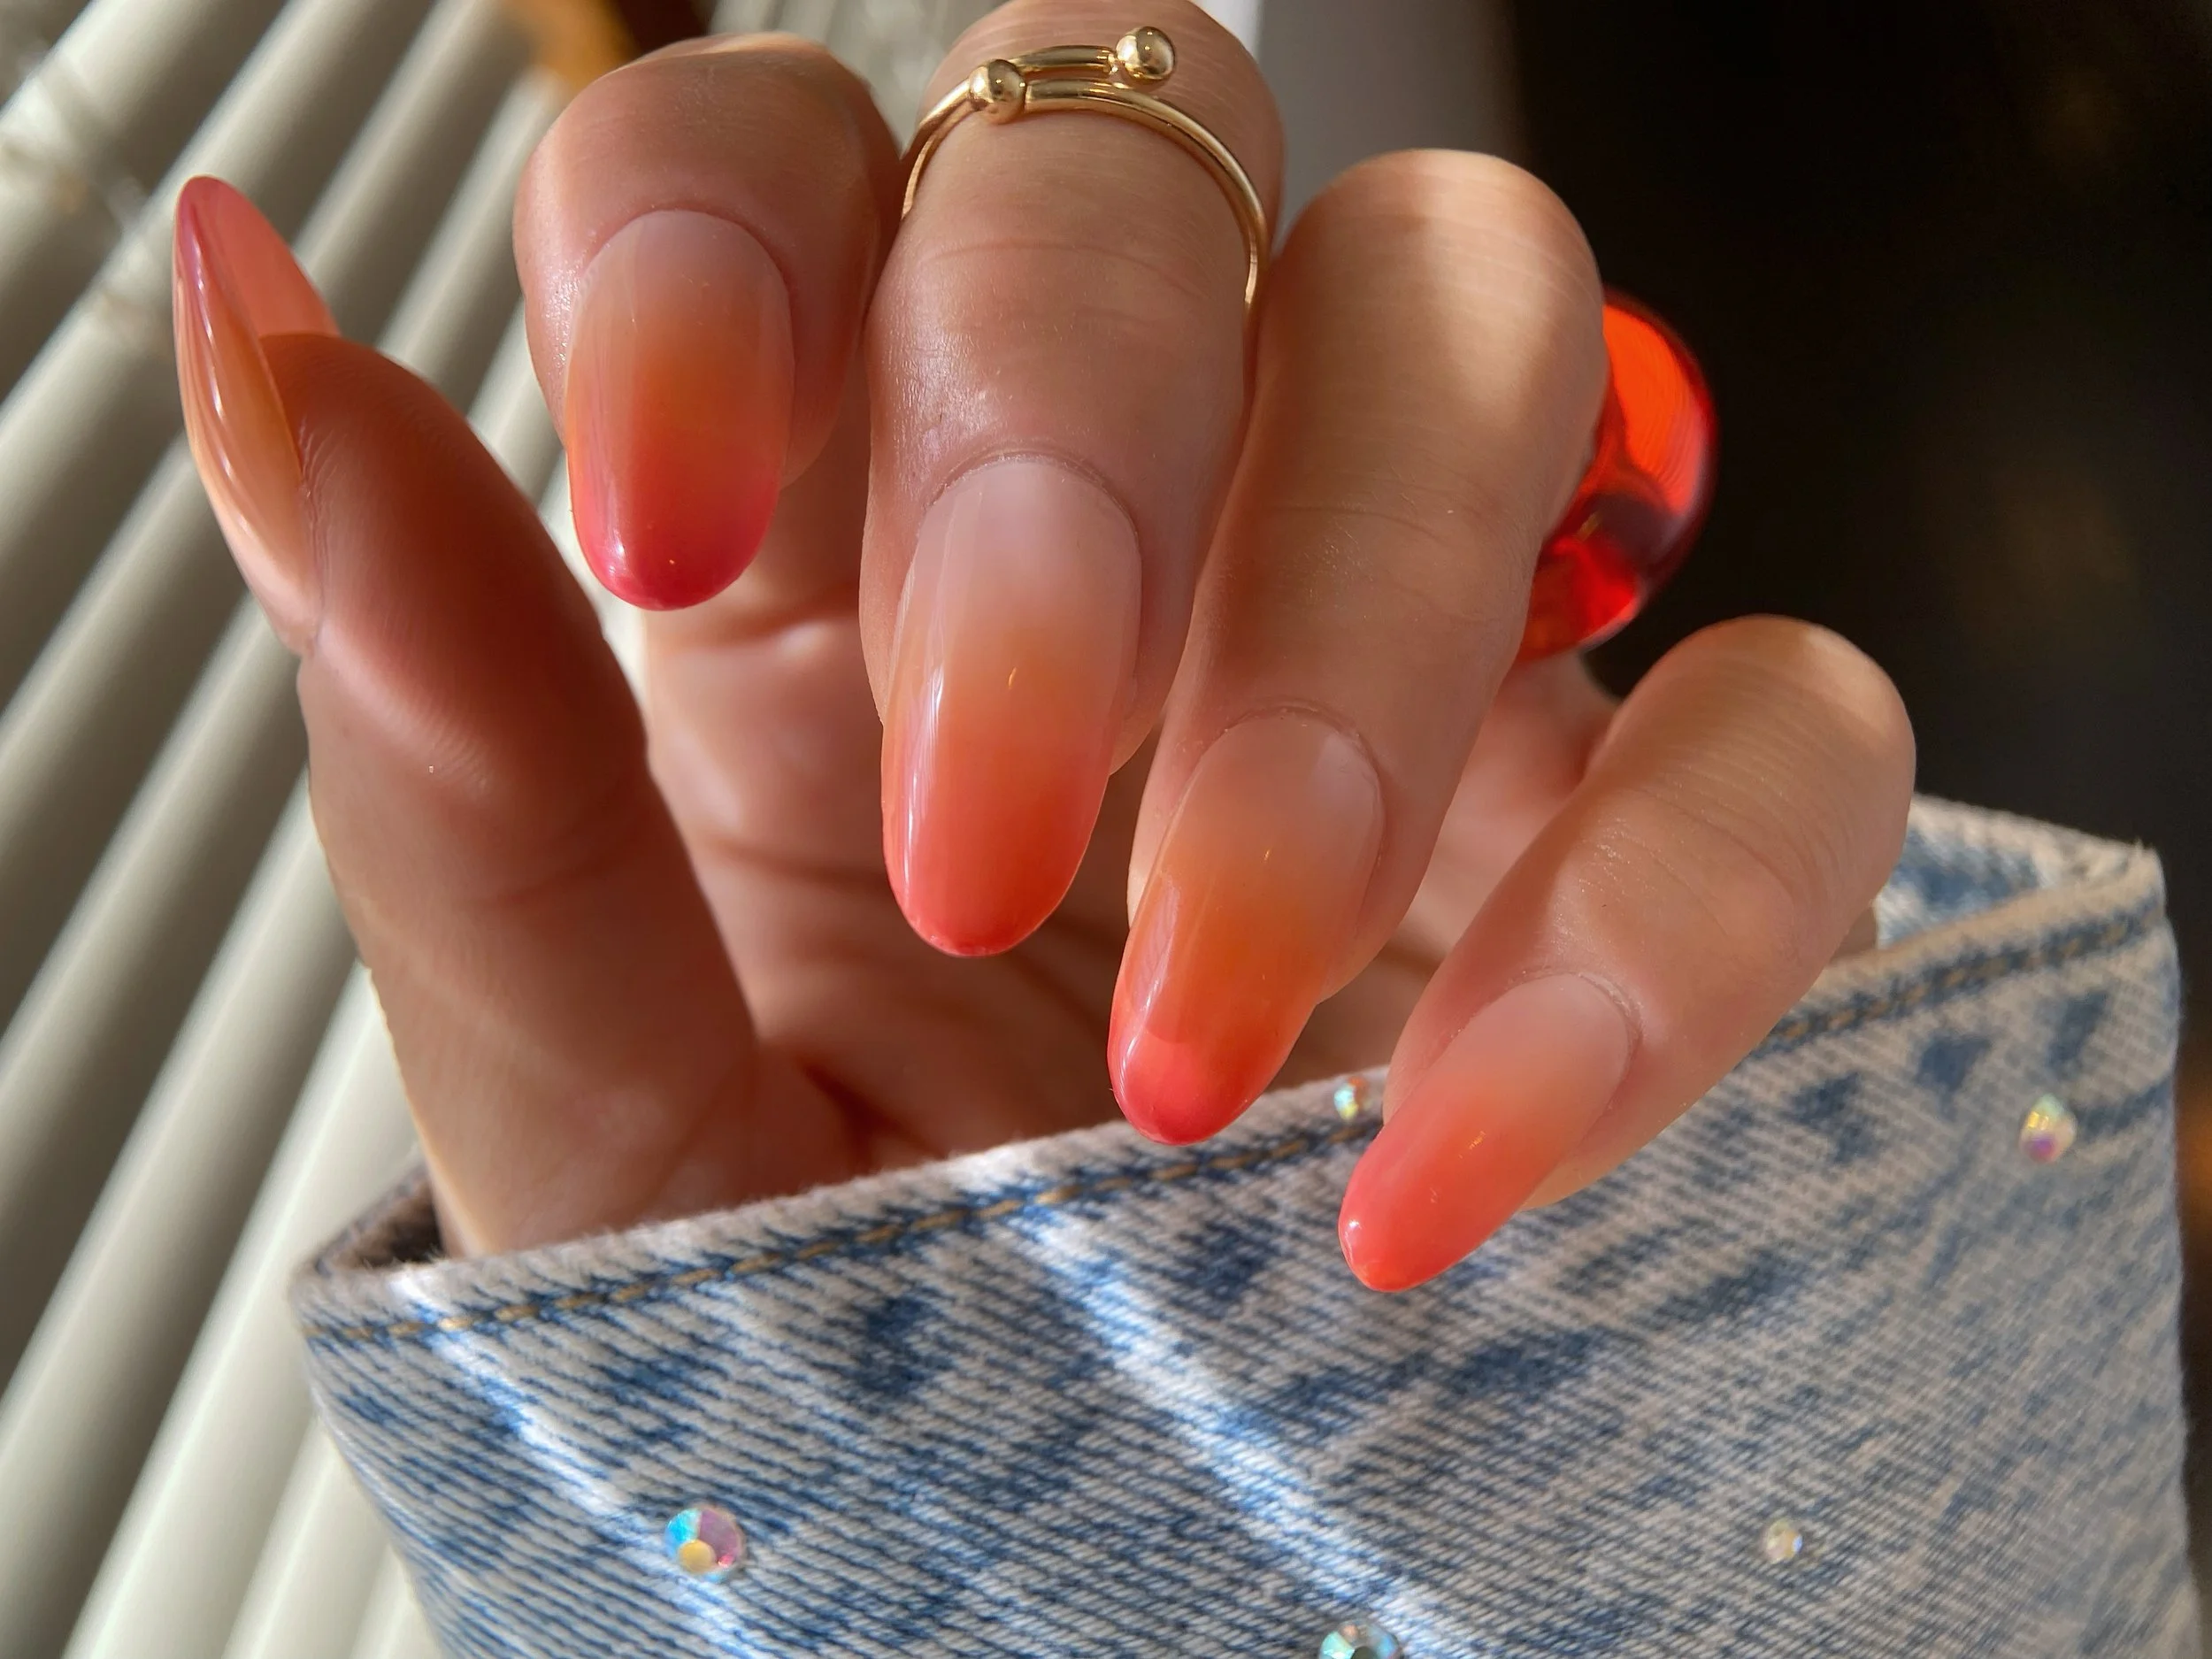
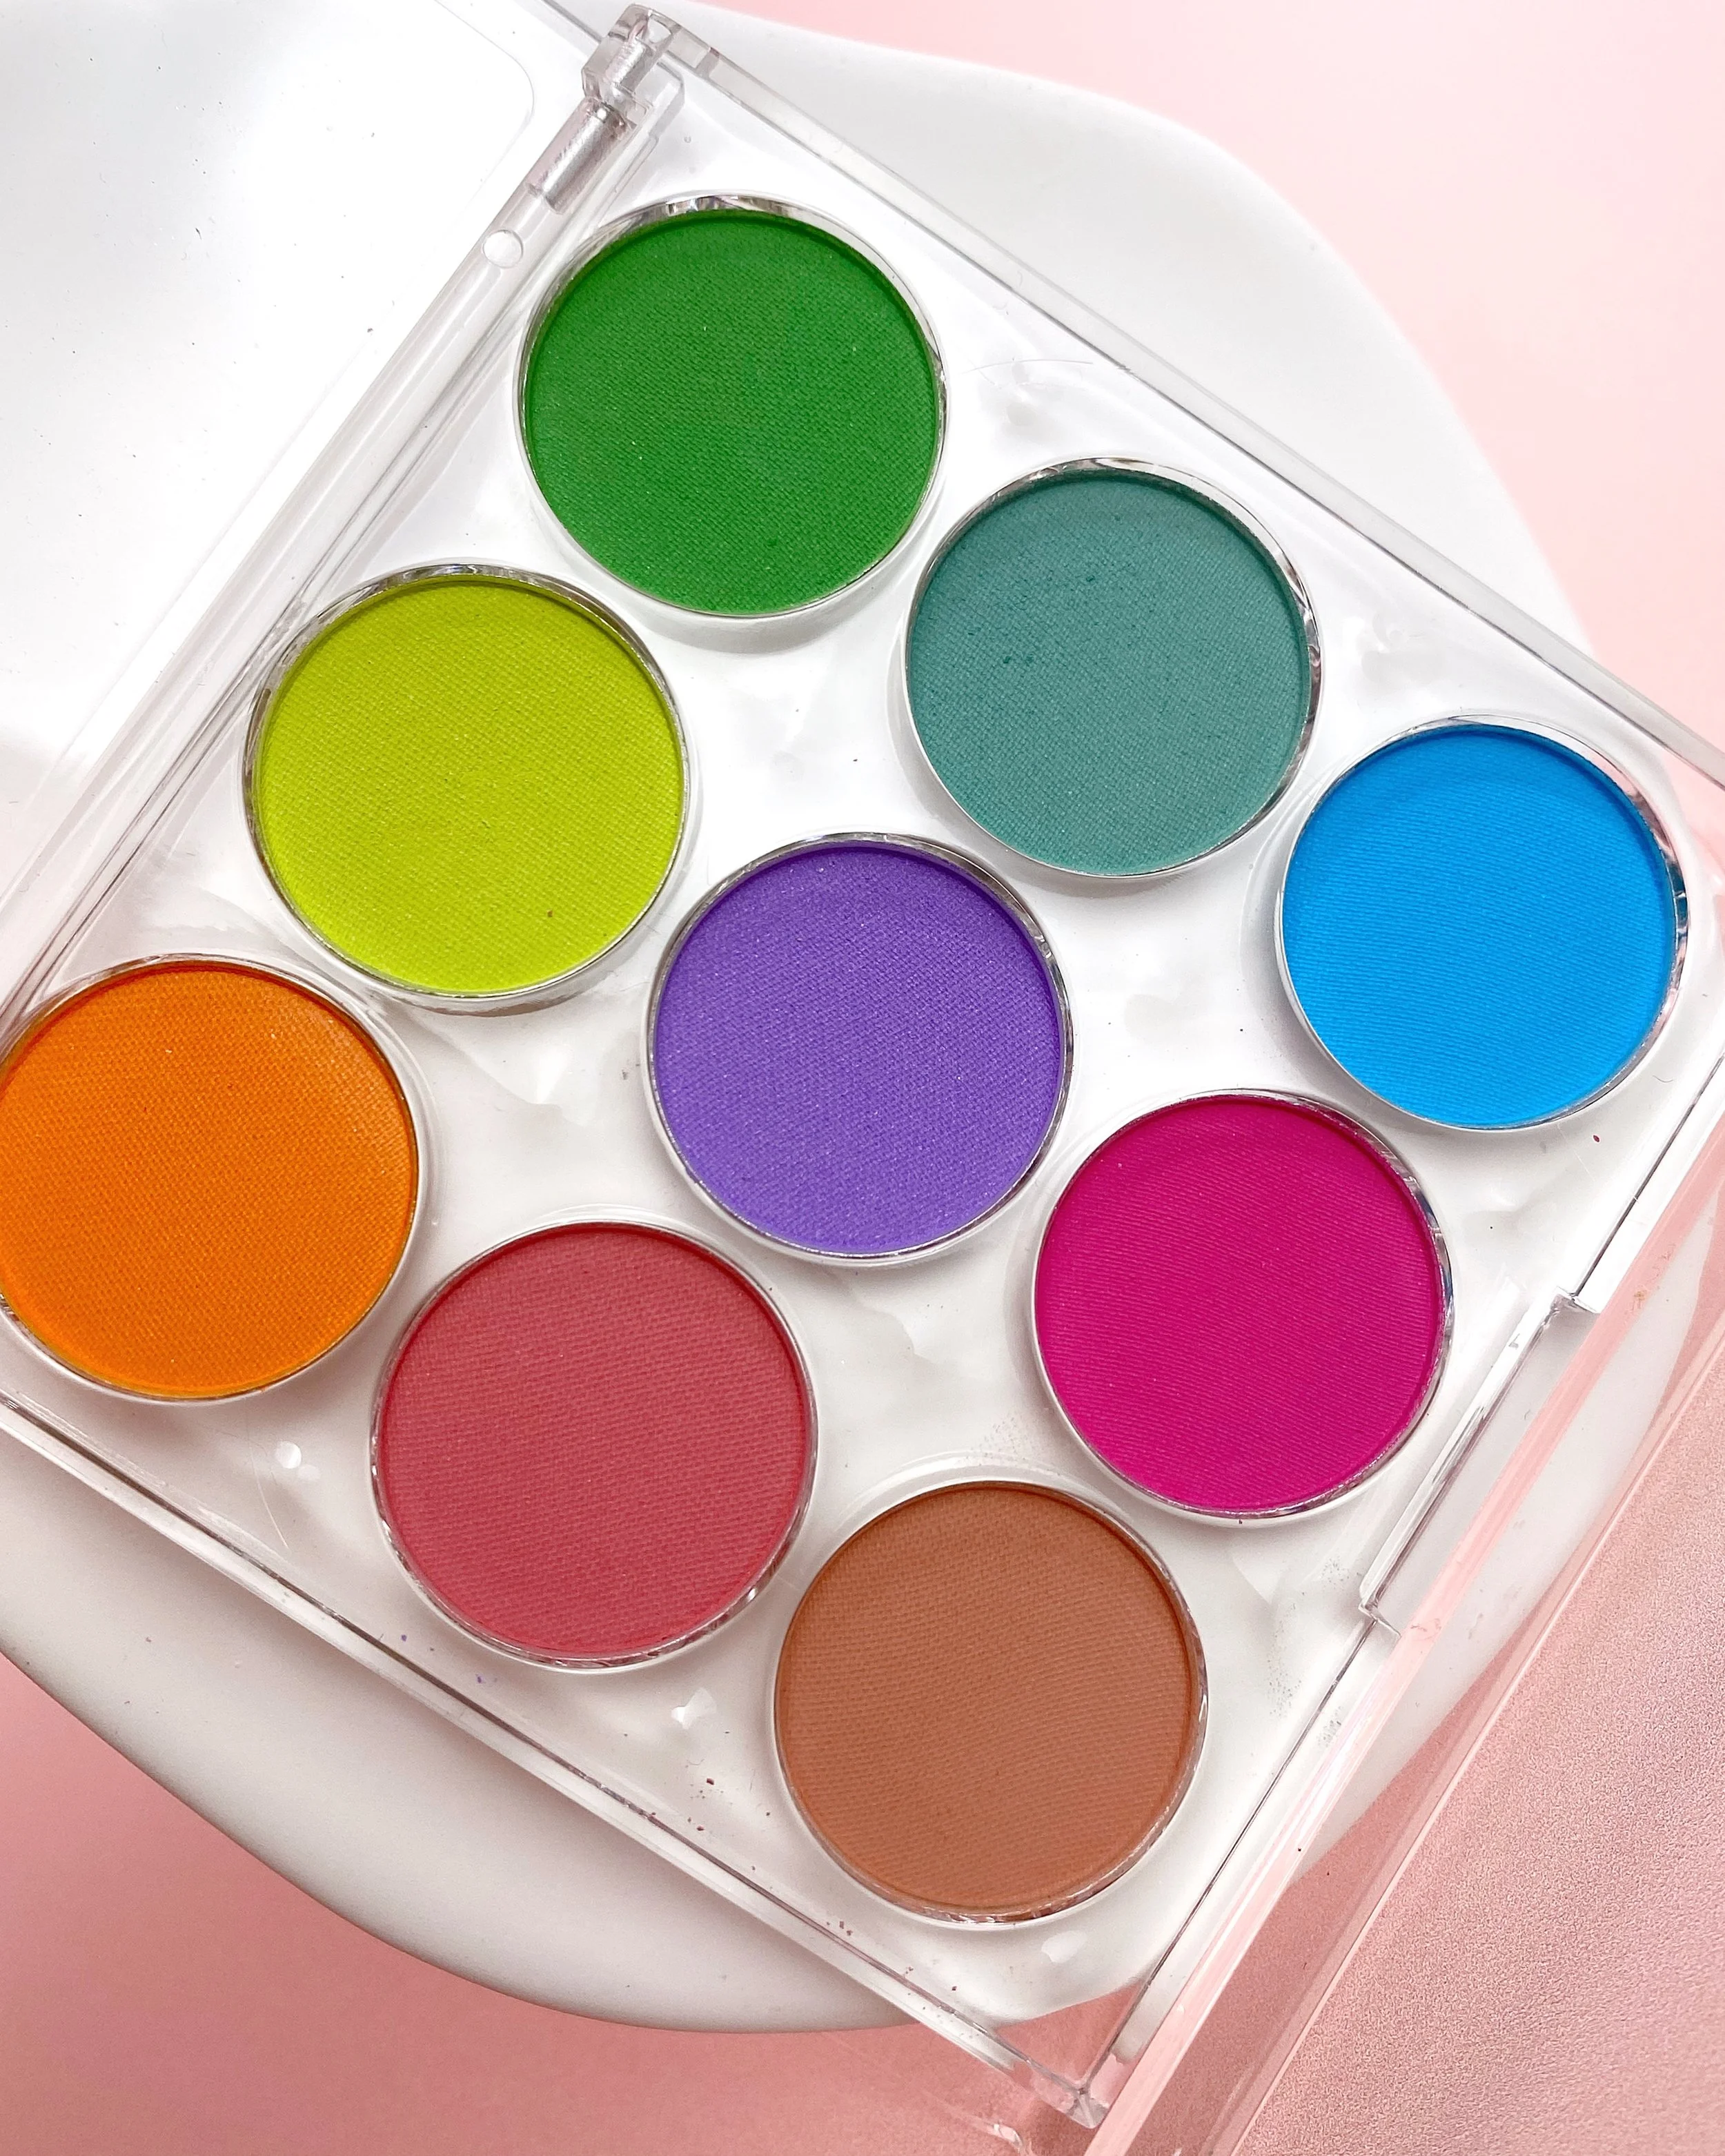
There are so many different ways to build an ombré nail. As a nail artist, I'm a fan of different techniques for different moods. Today I'm going to show you how to create a simple sunset ombré using the Vacation Nail Shop Soft Fade Gradient Palette in Arcade. Perfect for summer (or anytime you want a pop of color), Arcade combines vibrant brights with a couple of muted neutrals to create effortless color transitions.
If ombré nails have ever given you trouble, these palettes might be your knight in shining armor. The trick is not to overthink it. Place your point of intensity with intention and let the sponge do the work.
Harmonious Colors: Choosing the Right Color Combo for an Ombré
Harmonious colors will always make for an easier gradient. Think about colors that won't create mud when they overlap. Examples would be pink/red/orange, blue/purple/pink or yellow/green/blue. See where I'm going with this? Work smarter, not harder.
For most powder ombré looks, it's easiest to start with the lighter color and gradually build the deeper shade. If I'm creating a pink-to-red gradient, I always begin with pink and slowly build the red into it.
What Is a Point of Intensity?
Your point of intensity is the first place on the nail where the most product is deposited. If you want an aura nail, your point of intensity would be the center. On a gradient like the one in today's video, our point of intensity is the bottom third of the nail.
When I load my sponge, I always pay attention to where I'm applying pressure. I use a firmer pressure toward the tip and a softer pressure as I roll the sponge up toward the middle of the nail. Then I simply repeat that process until I've reached my desired intensity.
Once the color has more or less reached its final form, I go back and reinforce the point of intensity with a little more pigment. Finally, I take the clean side of my sponge and gently press the pigment into the matte surface. This removes excess powder while helping lock the remaining pigment into place.
A Note on Color
Because we're working with matte pigments on a matte surface, the colors will look lighter and chalkier than the finished result. A glossy top gel restores the depth and saturation of the color. It's important to swatch and play with your Soft Fade Gradient Palettes so that you have a better idea of what your end-result colors will be.
In the video below, you'll see me create a sunset ombré over a nude nail. It's a little longer than some of my tutorials, but stick with it because I'll also show you how I seal powder nail art (including chrome) into a gel manicure for a durable, long-lasting finish.
Here's What I Used
Non-latex cosmetic wedges
Nail file (180 grit or higher — in the video I use Erica's ATA Medium Mini Diamond File)
Soft dust brush
Want to support the blog and future tutorials? Use code RACHEL10 when you shop KOKOIST USA or Vacation Nail Shop to save on your next purchase.

Here's How I Did It
Starting with a fully cured neutral base color (I used KOKOIST Bottle'N Go BC-10 Ballet Shoes), apply an even layer of KOKOIST Velvet Matte Non-Wipe Top and cure for 20–30 seconds.
Grab two non-latex cosmetic wedges (I'm just going to call them "sponges" from here on out), one for each color in the gradient.
Gently pat the sponge into the orange pigment, being mindful to tap the same spot each time using consistent pressure. It's important that you can see the color naturally fade in intensity across the sponge.
Using firm pressure near the tip (remember our point of intensity) and gently rolling the sponge up the nail, deposit the pigment. Because we've already created a gradient on the sponge, the blend starts before it even touches the nail.
Once the pigment is placed, keep the sponge in position and gently press it into the matte surface. When you're happy with the blend, add a little more pressure near the tip to build intensity. Finish by using the clean side of the sponge to press the pigment into the surface and remove any excess powder.
The easiest way to ruin an ombré is by leaving loose pigment on the nail. It'll streak the moment you seal it in.
We're going to use the same technique with our pink pigment, but this time we'll focus on the tip of the nail, building intensity in the bottom quarter while blending about halfway into the orange. We don't want to lose that two-tone effect.
Place the gradient, press it into the surface, reinforce the tip with a little more pigment, then use the cleaner side of the sponge to remove any excess powder.
If needed, go back with the remaining orange pigment and gently reinforce the transition. Again, finish by using the cleaner side of the sponge to press the pigment into the surface and remove any excess.
Using a clean, soft dust brush (in the video I use a makeup brush), give the nail one final sweep from cuticle to free edge. If needed, wipe the brush on a paper towel as you work to avoid redepositing loose pigment.
When working with powder products (including chrome powders), you have to make sure they're properly sandwiched between the base and top gel. Think of pigment exactly like chrome powder. It needs to be completely encapsulated to prevent chipping and premature wear.
Once the powder is sealed, there's no more filing. Make sure your shaping is exactly where you want it before applying the pigment and take care of any last-minute refinements before sealing everything in.
Once you understand how to control your point of intensity, this technique becomes incredibly versatile. Swap the colors for mood autumn tones or sweet pastels and the same method works every time. The sponge does most of the blending for you, making this one of my favorite ways to create smooth powder ombrés.
