Cashmere Snowflakes | Nail Art Tutorial
Subtle has never really been my default setting when it comes to nail art. I love a gaudy, sparkly ugly sweater-inspired set, but sometimes you just need a little J.Lo-in-a-beige-sweater kind of holiday nail art moment.
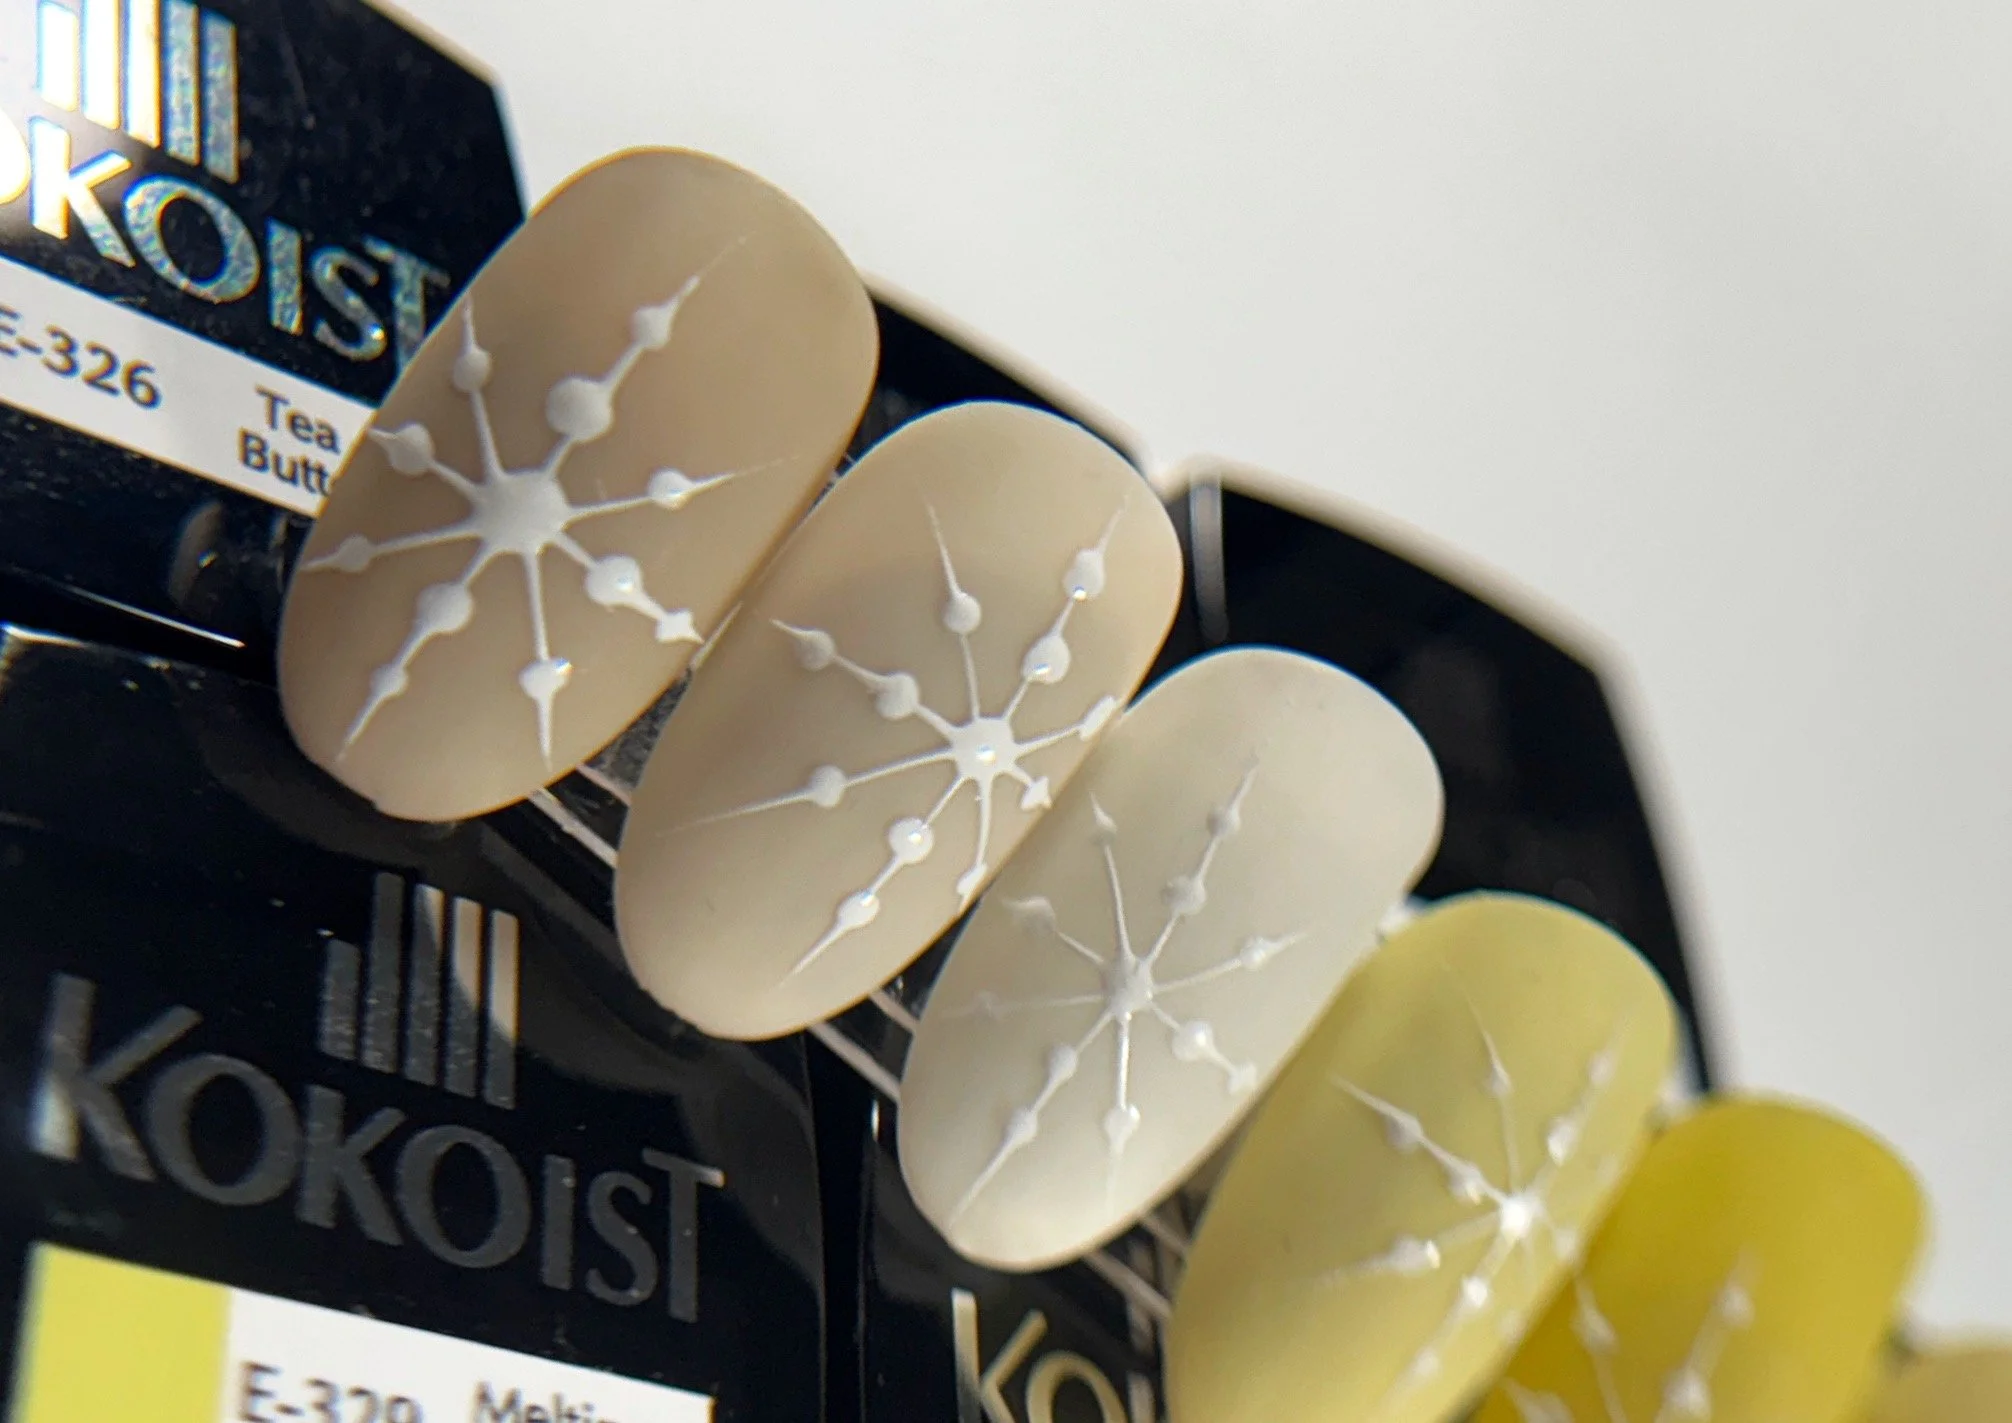
These soft neutral snowflakes combine buttery beige tones, a velvety matte finish, and crisp white detailing for a winter manicure that feels festive without relying on the traditional holiday color palette. It's cozy, understated, and proof that holiday nails don't have to be red, green, or covered in flair to feel seasonal.
Watch the Tutorial
Products Used
Kokoist Color Gel E-326 Tea Butter
Kokoist Velvet Matte Non-Wipe Top Coat
Kokoist White Markers Line No-Wipe Art Gel
Dotting Tool
Long Liner Brush
Ready to Create?
For the base color, apply two coats of a warm beige neutral, curing between coats. I used Kokoist E-326 Tea Butter. If you prefer a builder base look, Nail Thoughts Base NTB-23 Chai Latte would also work beautifully, but I personally prefer the appearance of a creamy, full-coverage color.
Using Finishes to Create Depth
Once your color is cured, apply Velvet Matte Non-Wipe Top Coat and cure.
Using different finishes helps emphasize the design. A matte backdrop provides contrast for the glossy snowflake details, creating additional depth without adding bulk.
Matte surfaces naturally recede while glossy surfaces come forward, helping the snowflakes stand out against the neutral background. It's a simple technique, but the contrast between the two finishes is what makes this design feel a little extra special.
Raised Detail
This is where the magic happens, and the magic is the White Markers Line No-Wipe Art Gel. It's one of my favorite art gels because it doesn't require a top coat. Working over a cured matte finish creates a subtle raised effect and a beautiful contrast between the velvety background and the glossy white snowflakes.
It's also fantastic for isolated chrome applications, although you'll definitely need a top coat for that.
Building the Snowflake
For the snowflake design you'll need a dotting tool and a long liner brush.
Start by placing a larger dot in the center of the snowflake. Add two smaller dots above, below, and to either side of the center dot. Once you've established those guide dots, add an additional dot in each open space, aligning it with the first outer dot.
Connect the Dots
While the gel is still wet, drag your liner brush from the center of the design through each row of dots. As you pass through the final dot, gently lift the brush to create a crisp tapered finish. You'll have to get it all at once, so be gentle and intentional with your strokes.
Once your snowflake is snowflaking to your liking, give it a full cure. No top coat required, you're good to go!
Give It Some Personality
I like to mix up the manicure by placing the snowflakes slightly off-center so they feel like they're cascading across the nails rather than sitting perfectly centered on each finger.
Simple, cozy, and just festive enough.
Is the winter magic calling your name? Use code RACHEL10 to save 10% on your next Kokoist USA order.
This post may contain gifted product, sponsored content, affiliate links, and/or affiliate discount codes. I may earn a commission from qualifying purchases made through these links or codes at no additional cost to you. All opinions are my own unless otherwise stated.
Content, photos, and videos may not be copied, downloaded, edited, reproduced, republished, or used for commercial, advertising, or promotional purposes without prior written permission.
For additional information, please review my full disclosure statement at rachelmessick.com/disclosure.